Interlinkify Documentation
Follow this documentation to create your account, connect your WordPress website, verify your sync token, scan content, review reports, manage internal links, and use AI-powered Interlinkify features.
Sign Up Process
To create an account on Interlinkify, visit the registration page and choose your preferred sign-up method.
- Go to https://app.interlinkify.com/register.
- Use standard registration by entering your name, email address, username, and password.
- Or use Google Sign-Up to register quickly with your Google account.
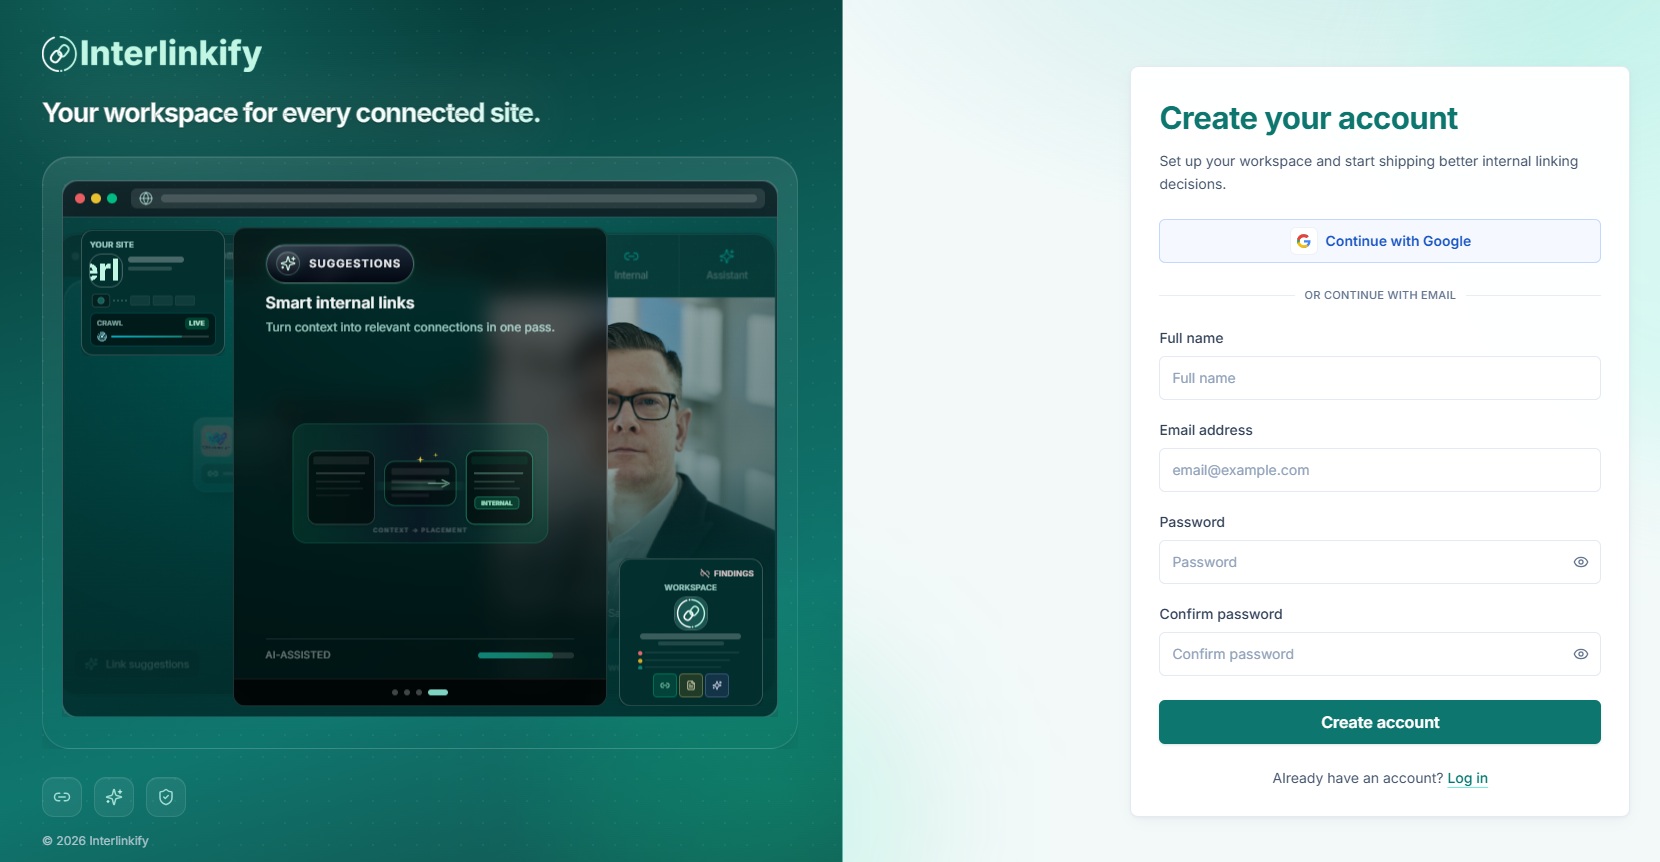
Enter Your Details
Used for your account profile.
This will be your login ID.
Use a unique username for your account.
Must be at least 8 characters, with 1 uppercase, 1 lowercase, and 1 number.
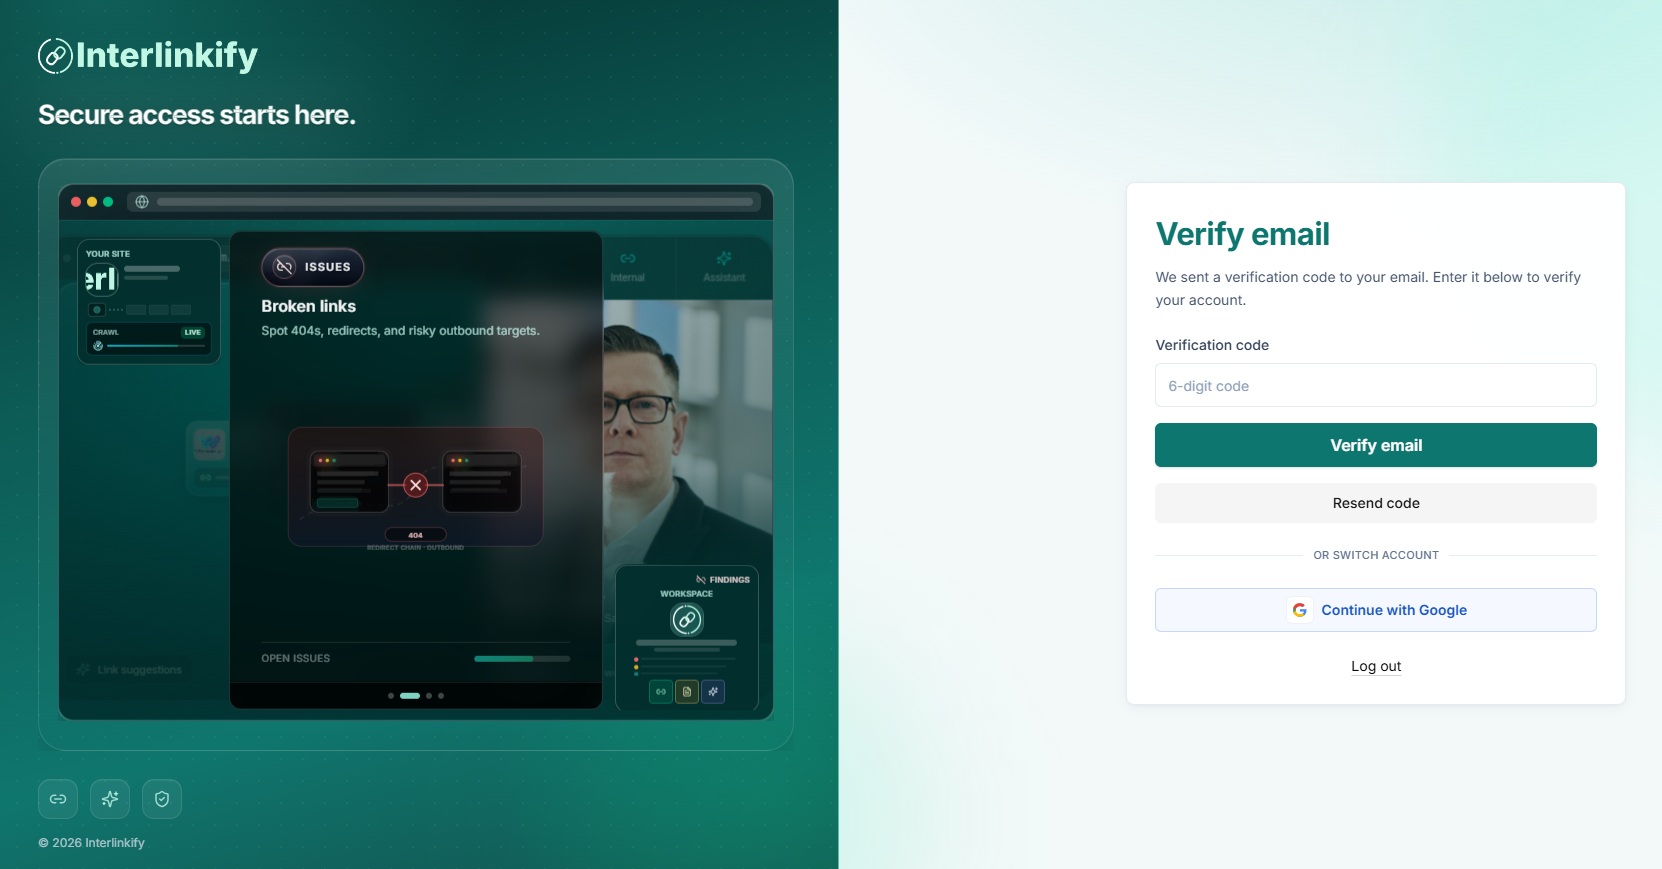
Verify Your Email
After signing up, an automatic verification email will be sent to the email address you provided.
- Check your inbox for the verification email.
- If you do not see it, check your Spam or Junk folder.
- Open the email and copy the verification code included in the message.
- Return to the Interlinkify website and paste the code into the verification field.
- Once verified, your account will be fully activated and ready to use.
Connected Sites
The Connected Sites section connects your WordPress website with the Interlinkify dashboard. After connecting your site, Interlinkify can scan posts, generate internal link suggestions, detect issues, and show reports.
Step 1: Open Connected Sites
Log in to your Interlinkify dashboard and click Connected Sites from the left sidebar.
Step 2: Download the WordPress Plugin
On the setup screen, click the Download button to download the Interlinkify plugin ZIP file. The plugin file may look like interlinkify-premium.zip.

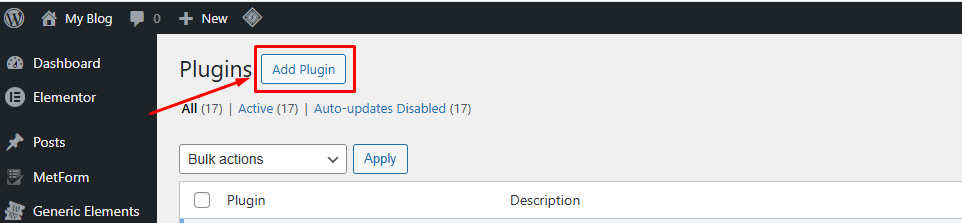
Step 3: Go to Your WordPress Dashboard
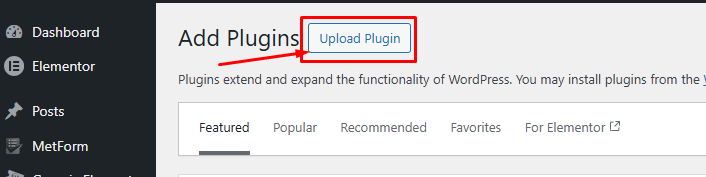
Log in to your WordPress admin panel, then go to Plugins -> Add New and click Upload Plugin.
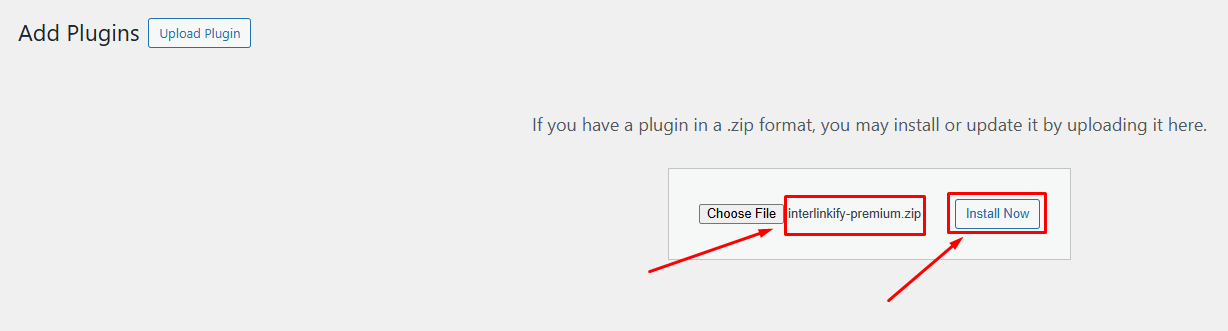
Step 4: Upload the Plugin ZIP File
Click Choose File, select the ZIP file downloaded from the Interlinkify dashboard, then click Install Now.

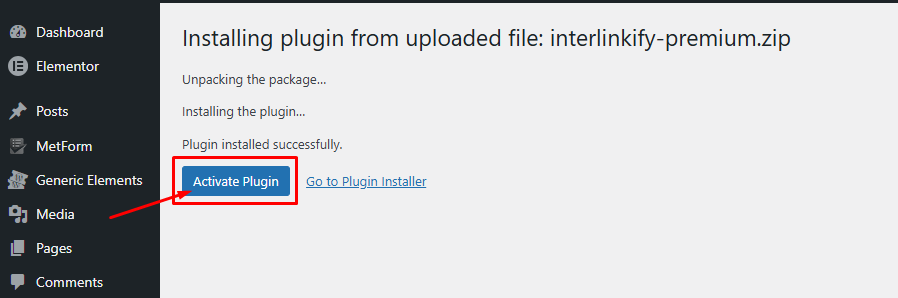
Step 5: Activate the Plugin
After installation is complete, click Activate Plugin. Once activated, Interlinkify appears in your WordPress dashboard sidebar.
Step 6: Return to the Interlinkify Dashboard
Go back to the setup screen and click Go next to continue to the site registration step.

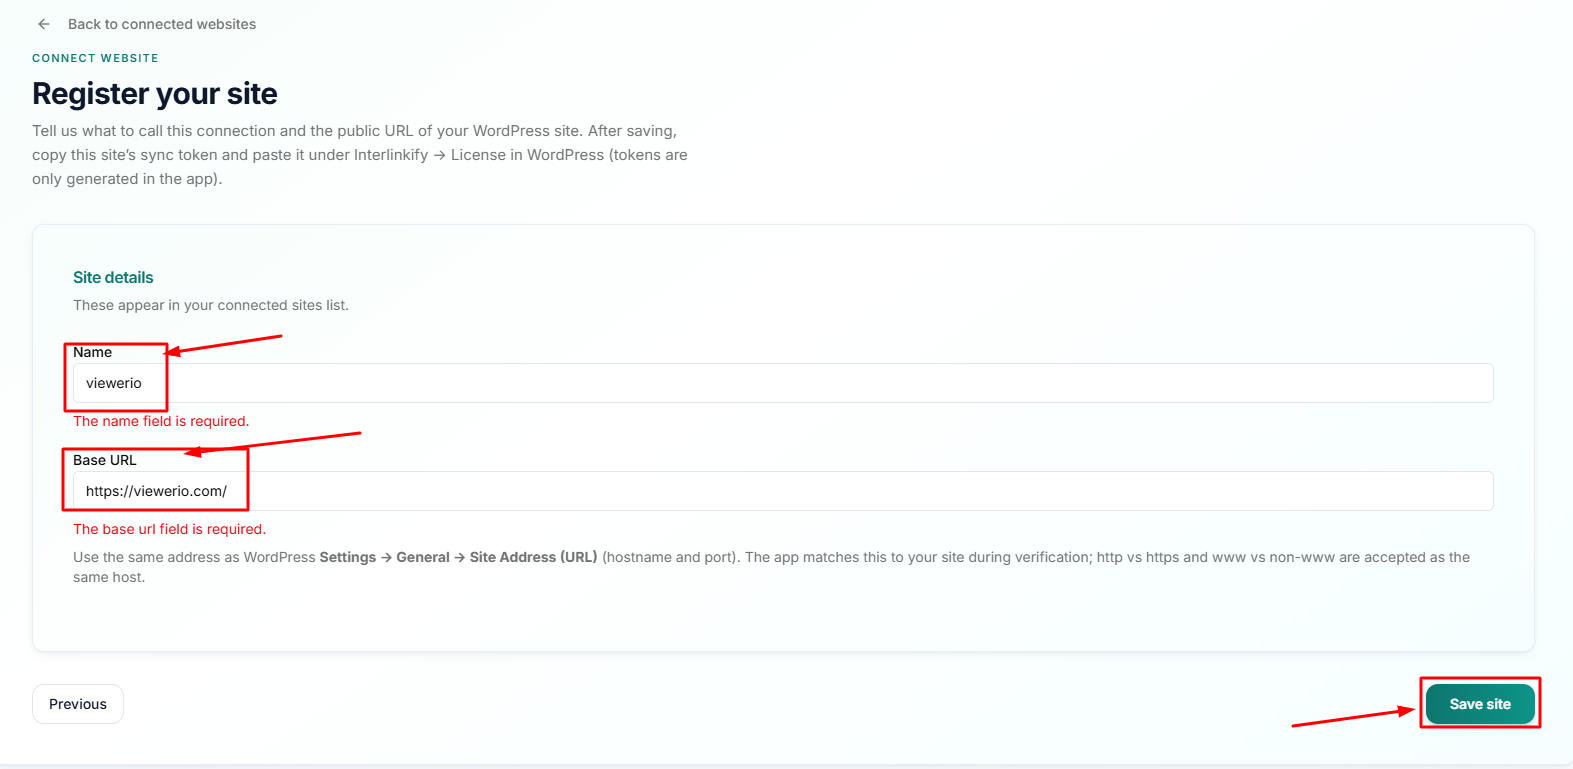
Step 7: Register Your Website
On the Register your site screen, enter your Site Name and Base URL. Make sure the Base URL matches your real WordPress site URL, then click Save Site.
Step 8: Copy the Workspace Sync Token
After saving your site, Interlinkify generates a Workspace Sync Token. Click Copy to copy the token.
Step 9: Paste the Token in WordPress
Go to Interlinkify -> License in WordPress and paste the copied token into the Sync Token field.
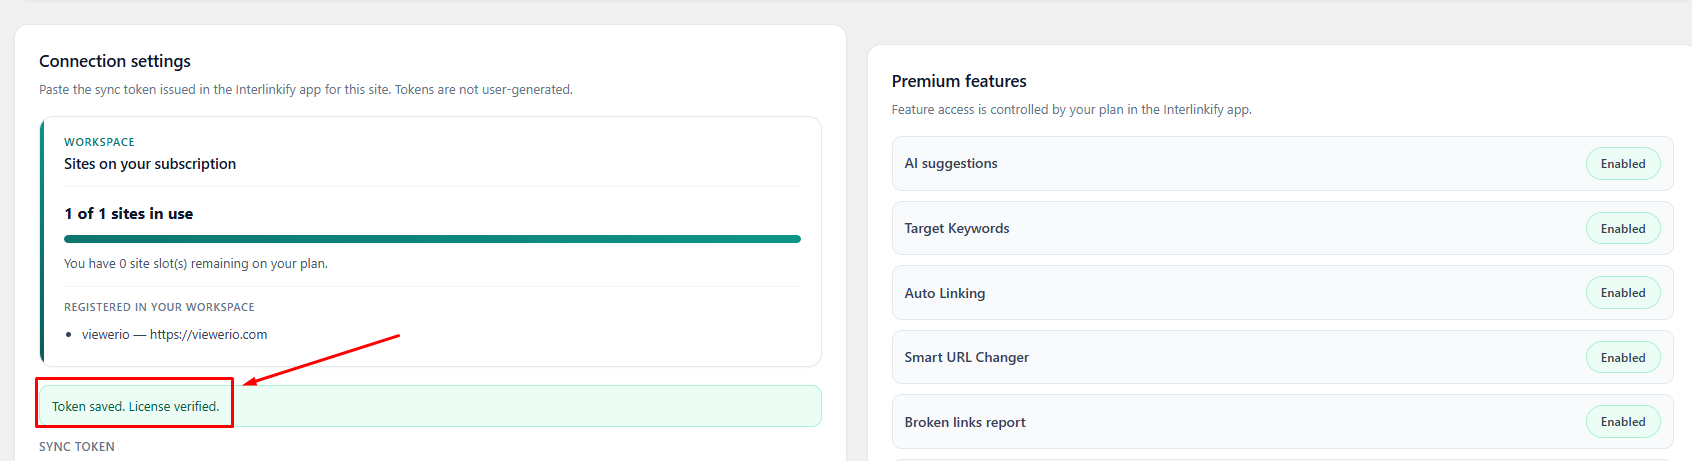
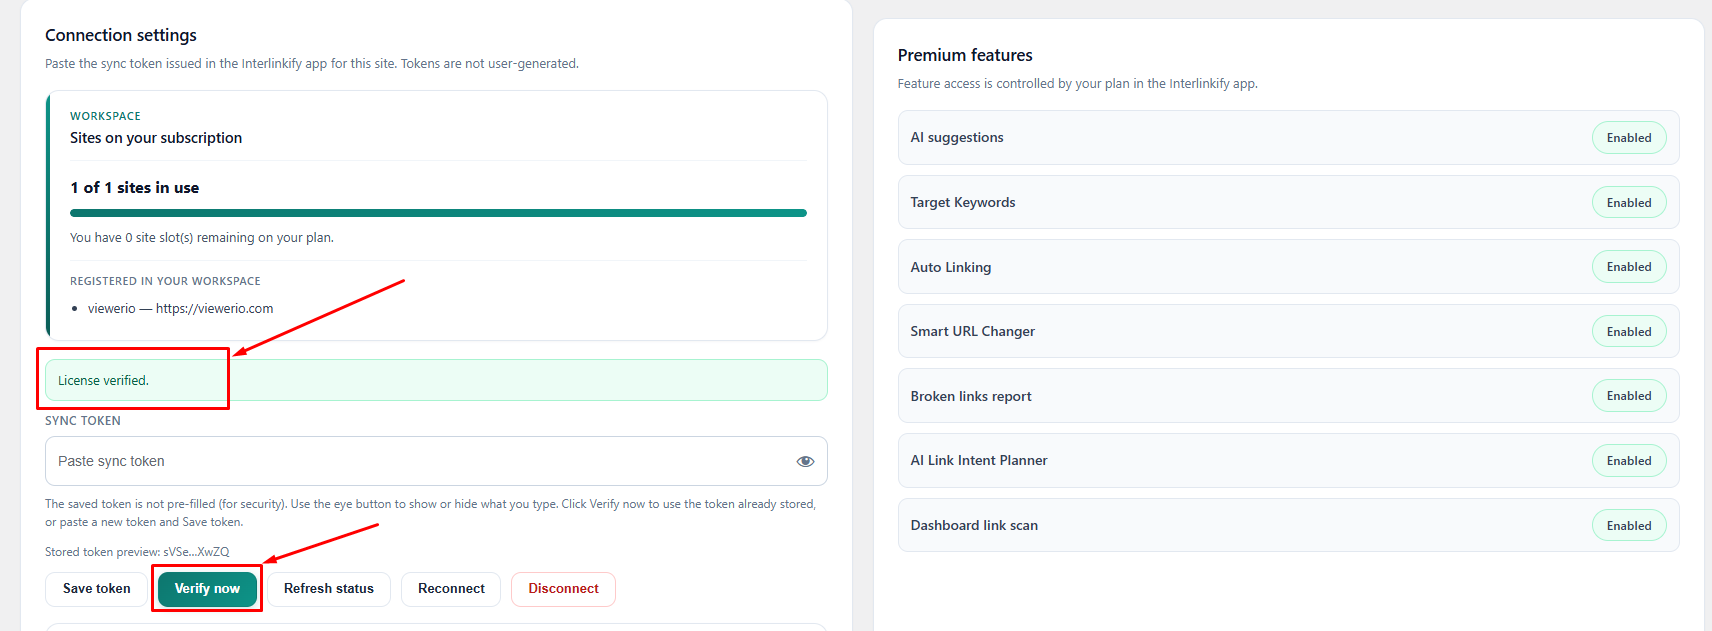
Step 10: Verify the Connection
Before clicking Verify Now, first click Save Token. After saving the token, click Verify Now. If successful, you will see a confirmation such as License verified.
What Happens After Connection?
After your site is connected, Interlinkify can access the enabled features in your WordPress plugin dashboard.
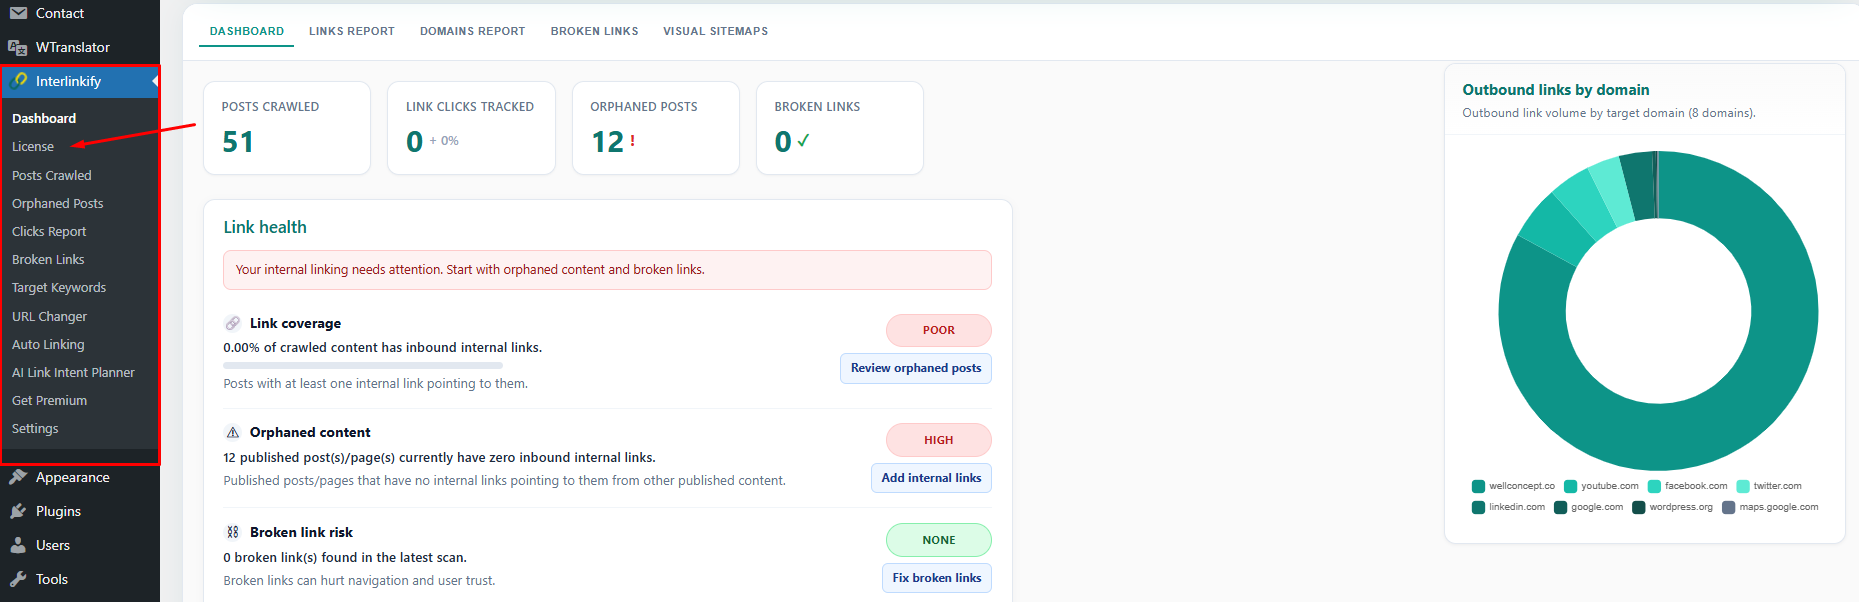
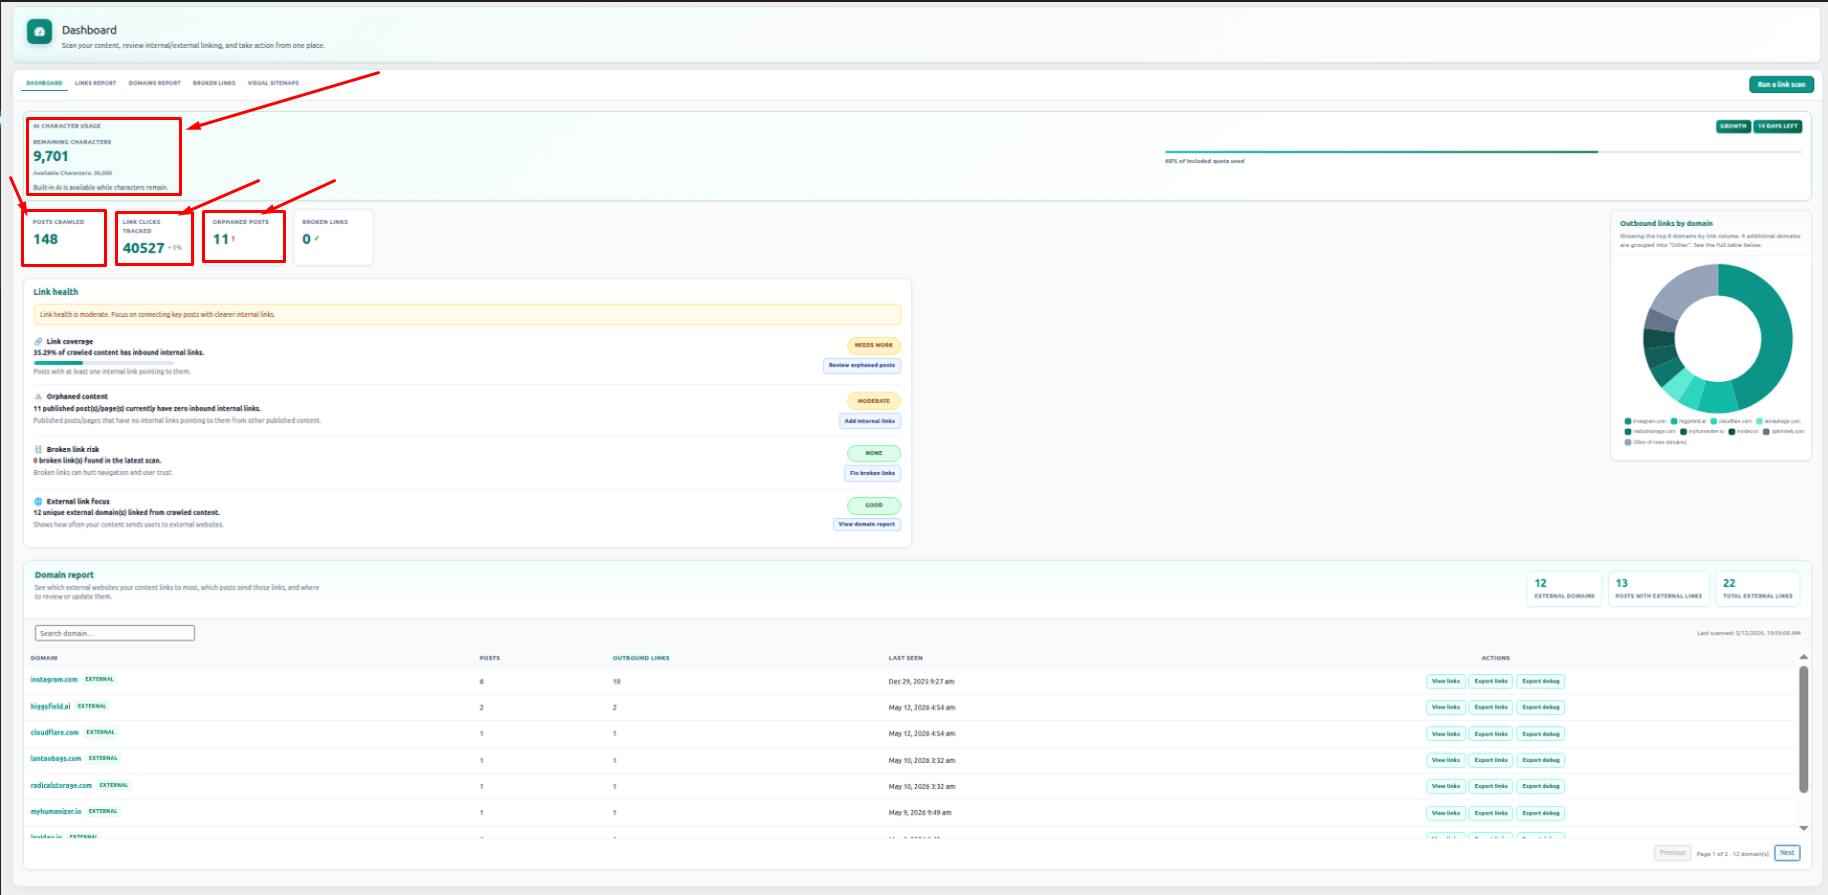
1. Dashboard
The Dashboard is the main control center of Interlinkify. It gives you a quick overview of internal linking performance, link count, scanned posts, and important reports.
- Open your WordPress dashboard.
- Click Interlinkify from the left sidebar.
- Review summary cards, link reports, broken link alerts, and recent activity.
The Scan Feature
The Scan feature checks your website content and updates Interlinkify reports. It helps detect internal links, broken links, orphaned posts, and new link opportunities.

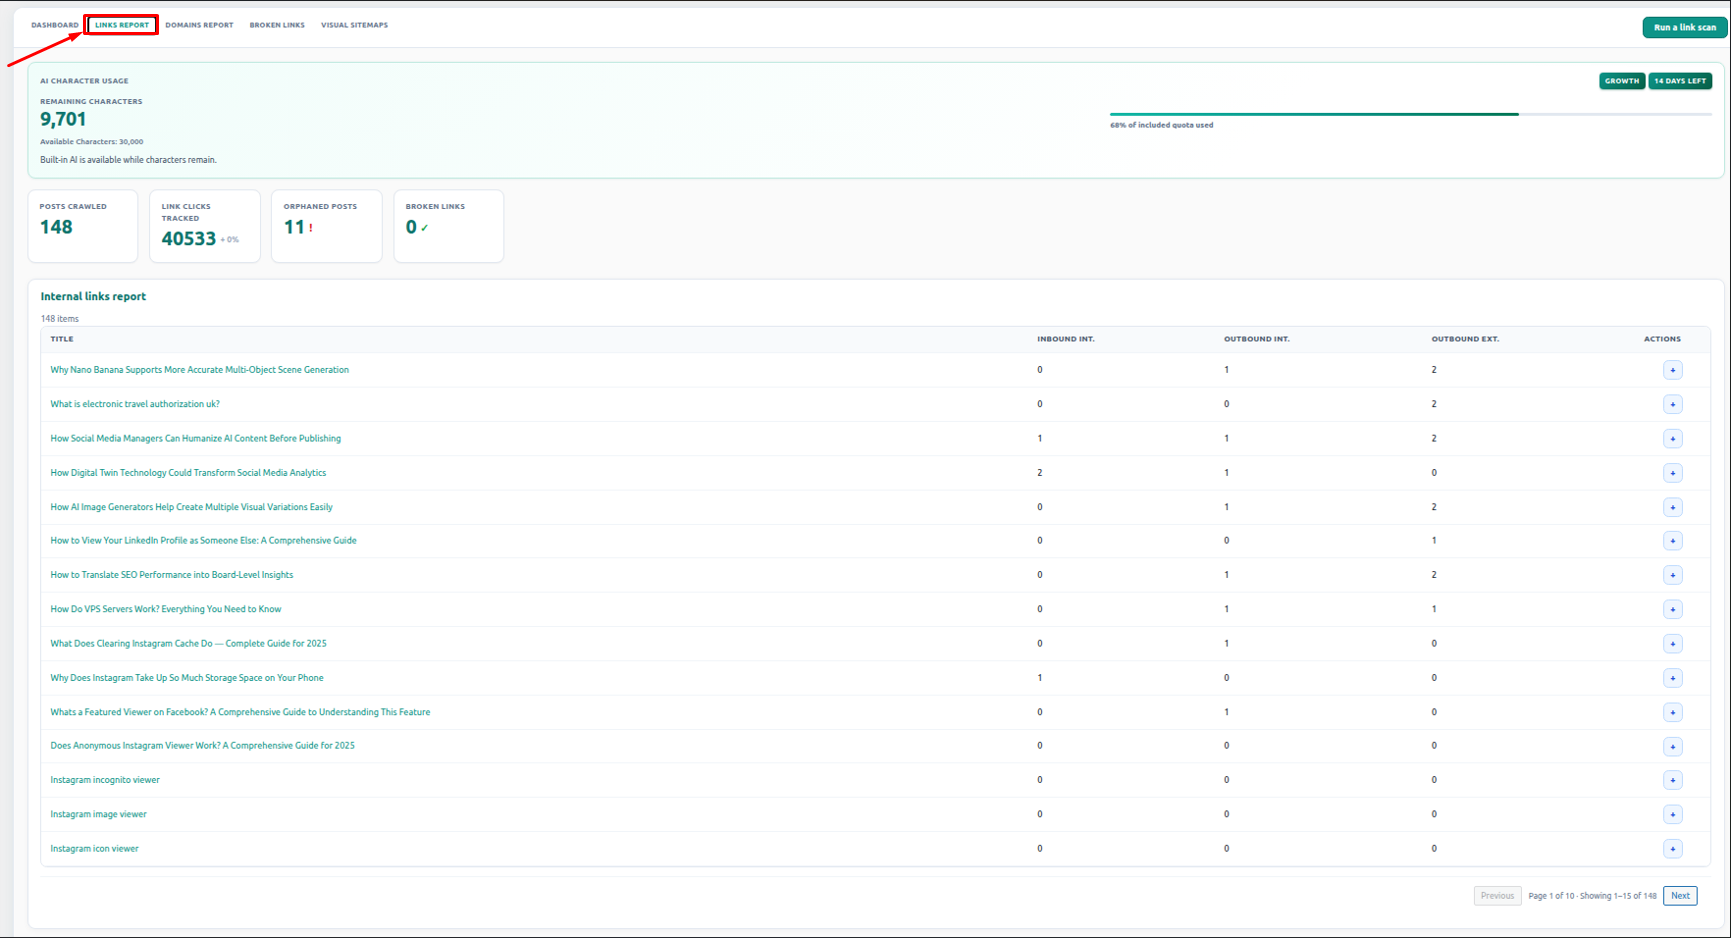
1.1 Link Report
The Link Report shows internal link details for your posts and pages, including inbound and outbound internal links.
- Go to Interlinkify -> Dashboard.
- Open the Link Report section.
- Review posts, pages, inbound links, outbound links, and internal link numbers.
- Use the data to improve weak pages with more internal links.
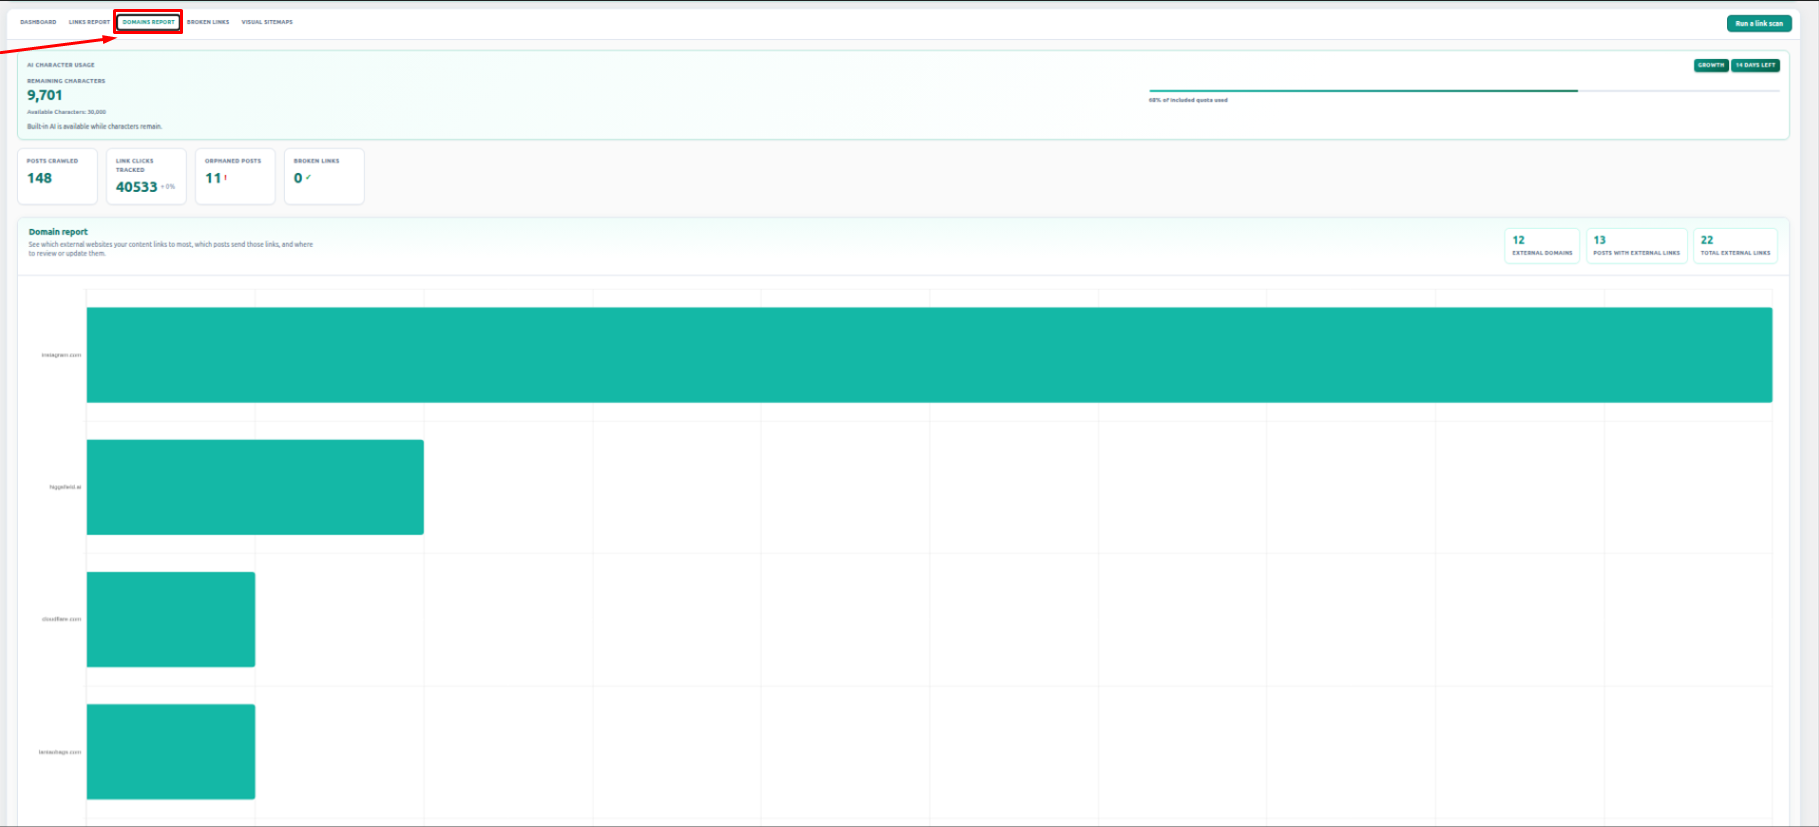
1.2 Domain Report
The Domain Report shows the domains linked from your website. It helps you understand which external websites your content links to.
- Open the Domain Report tab.
- Review listed domains and link counts.
- Identify unnecessary or repeated external links.
- Keep external linking clean and trustworthy.
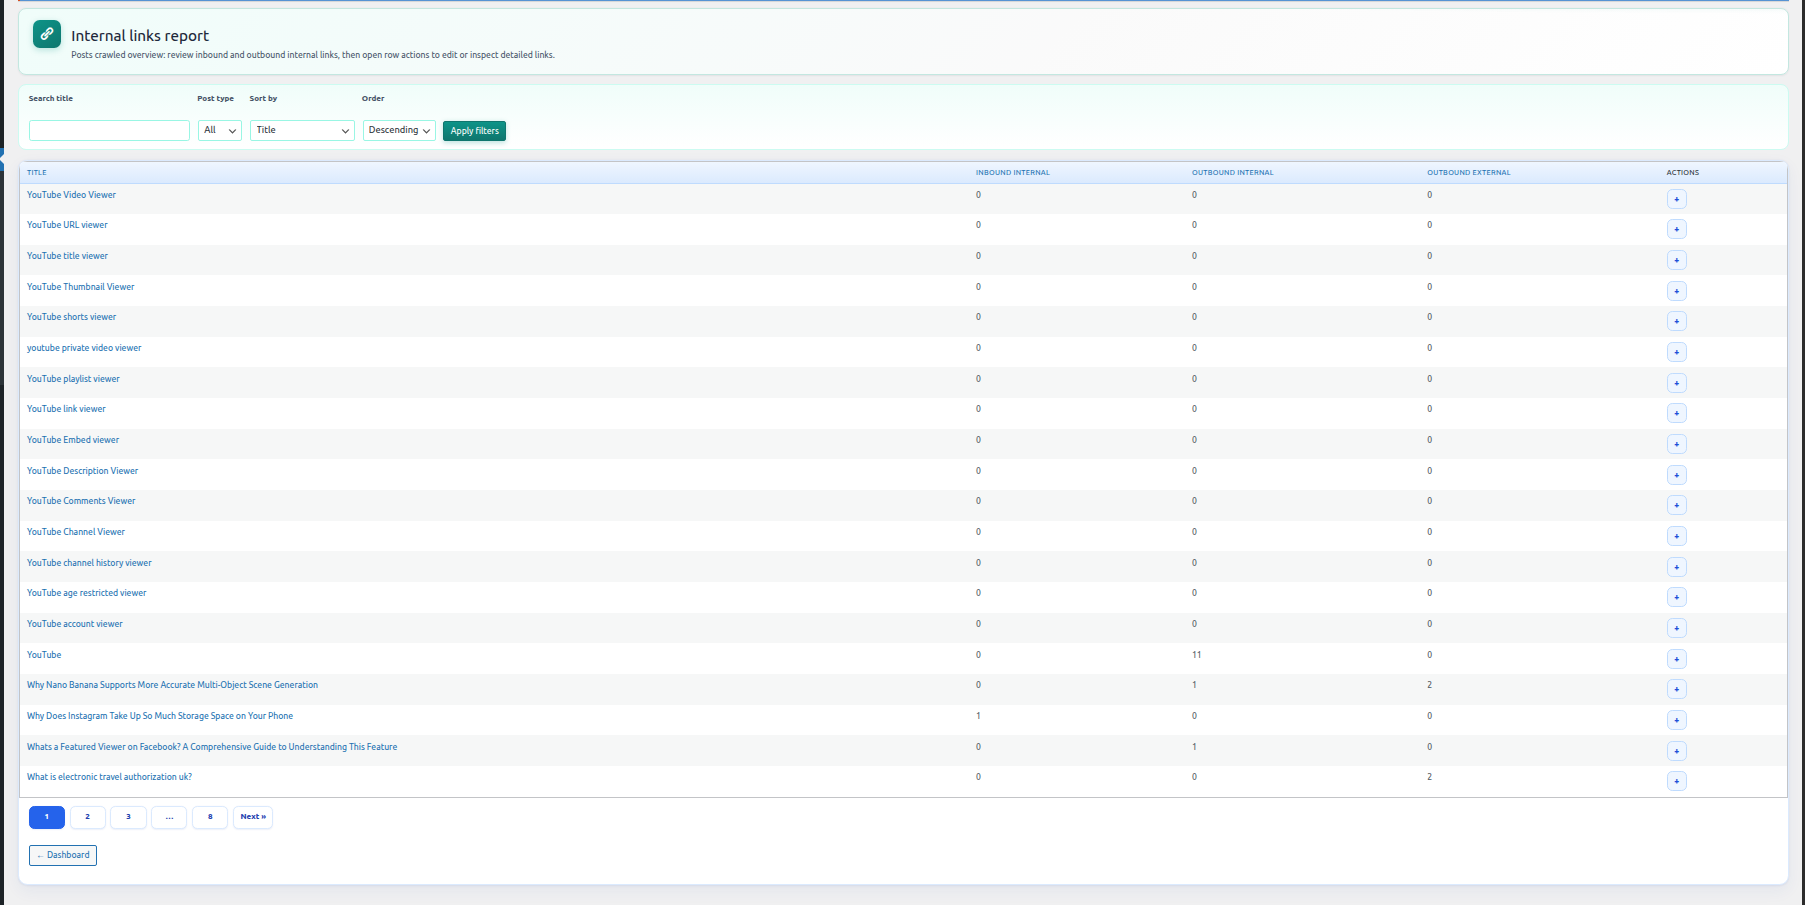
2. Posts Crawled
The Posts Crawled section shows posts and pages Interlinkify has already scanned. This confirms which content is included in internal link analysis.
- Click Posts Crawled from the Interlinkify menu.
- Review the scanned post list and internal link data.
- Use filters or search if needed.
- Re-scan if new posts or pages are missing.
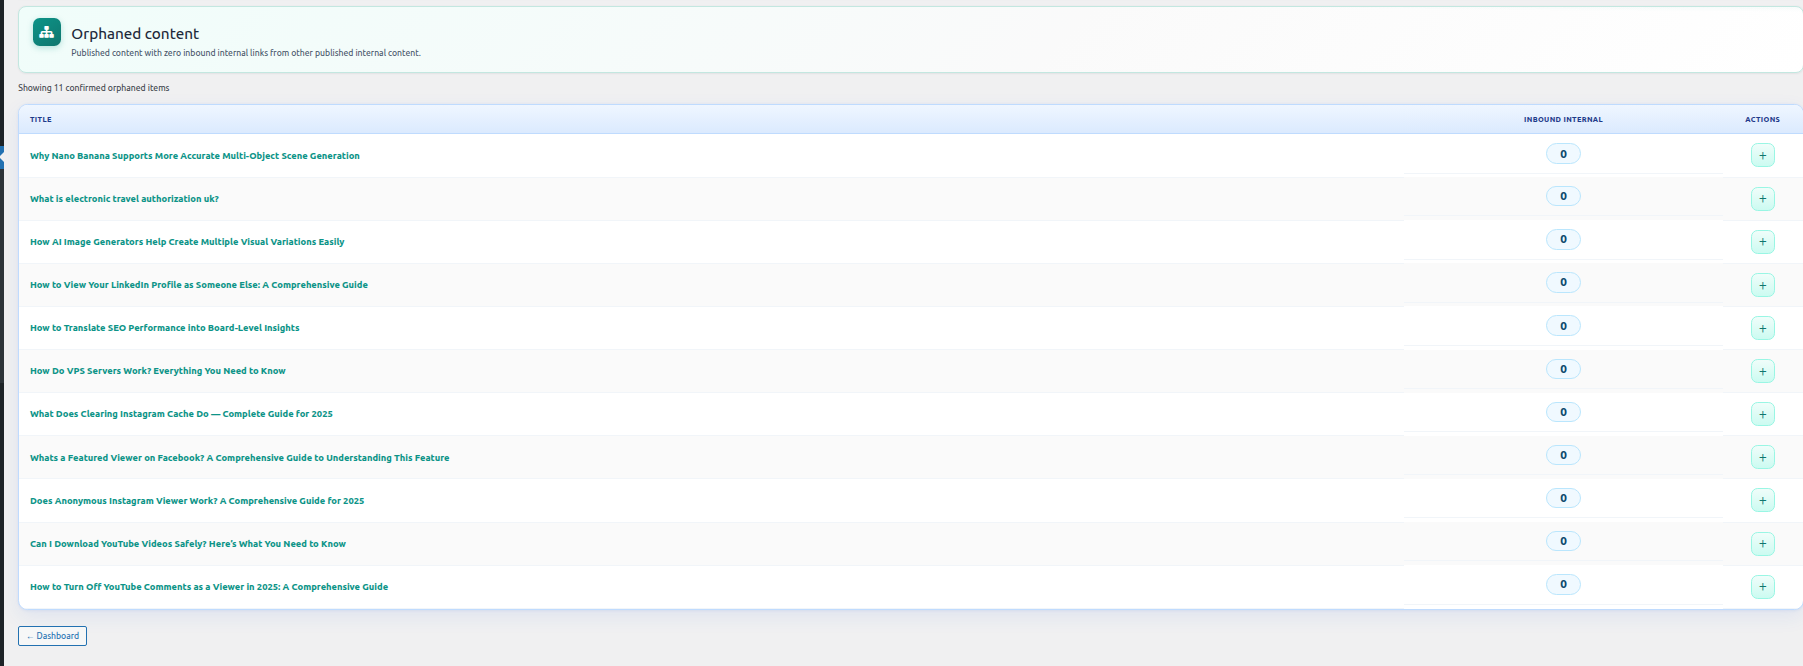
3. Orphaned Posts
Orphaned Posts are pages with little or no internal links pointing to them. These posts can be harder for users and search engines to discover.
- Open the Orphaned Posts section.
- Review posts with no inbound links.
- Select posts that need more links.
- Add relevant internal links and recheck the report.
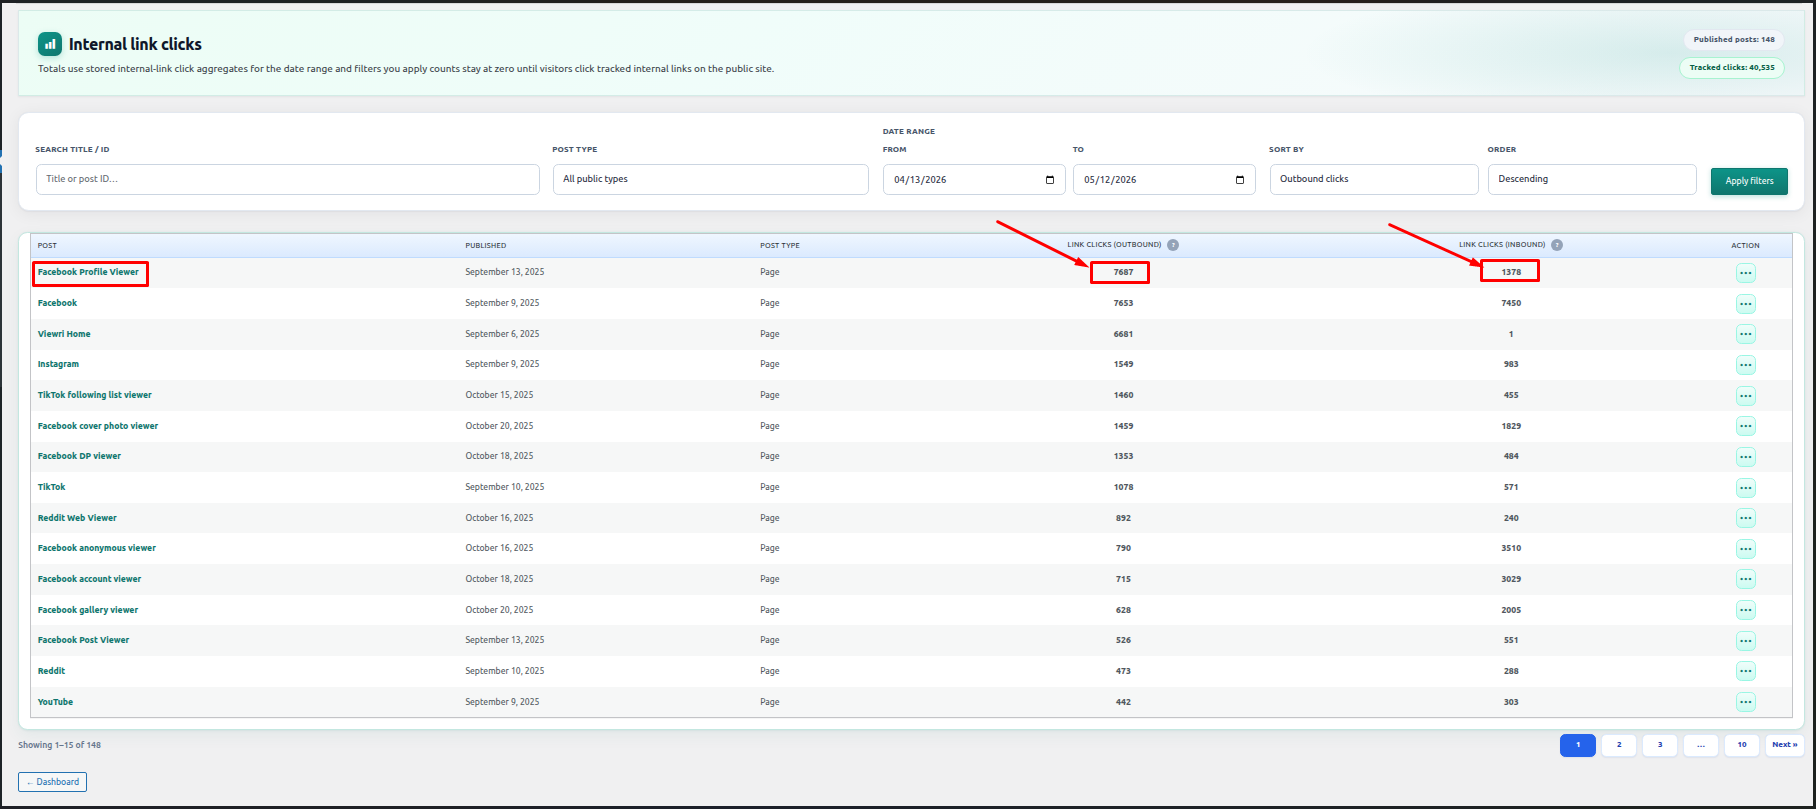
4. Clicks Report
The Clicks Report shows how users interact with your internal links. It helps you understand which links are getting clicks and which may need better placement.
- Go to Clicks Report.
- Review internal link click data, source pages, and target URLs.
- Identify links with high or low engagement.
- Improve anchor text or link placement where needed.
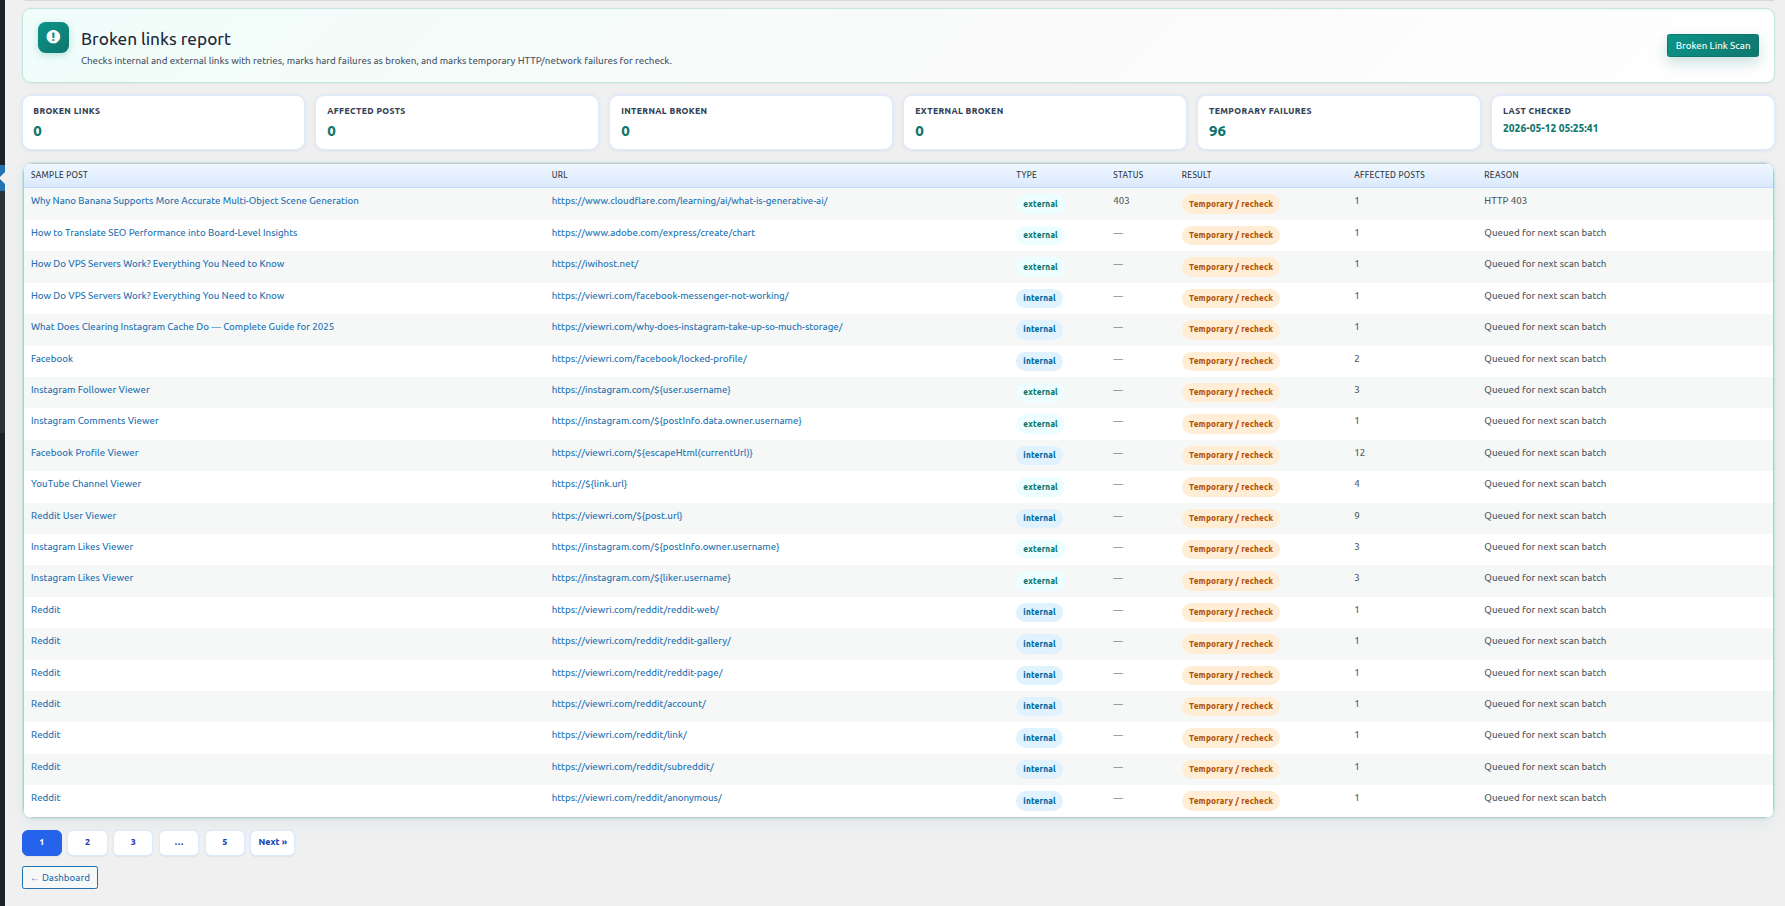
5. Broken Links Report
The Broken Links Report gives a detailed list of URLs that may be broken. It helps protect your website from poor user experience and SEO problems.
- Open the Broken Links section.
- Check the broken URL, source page, and status.
- Replace, update, or remove the broken link.
- Run another scan to refresh the report.
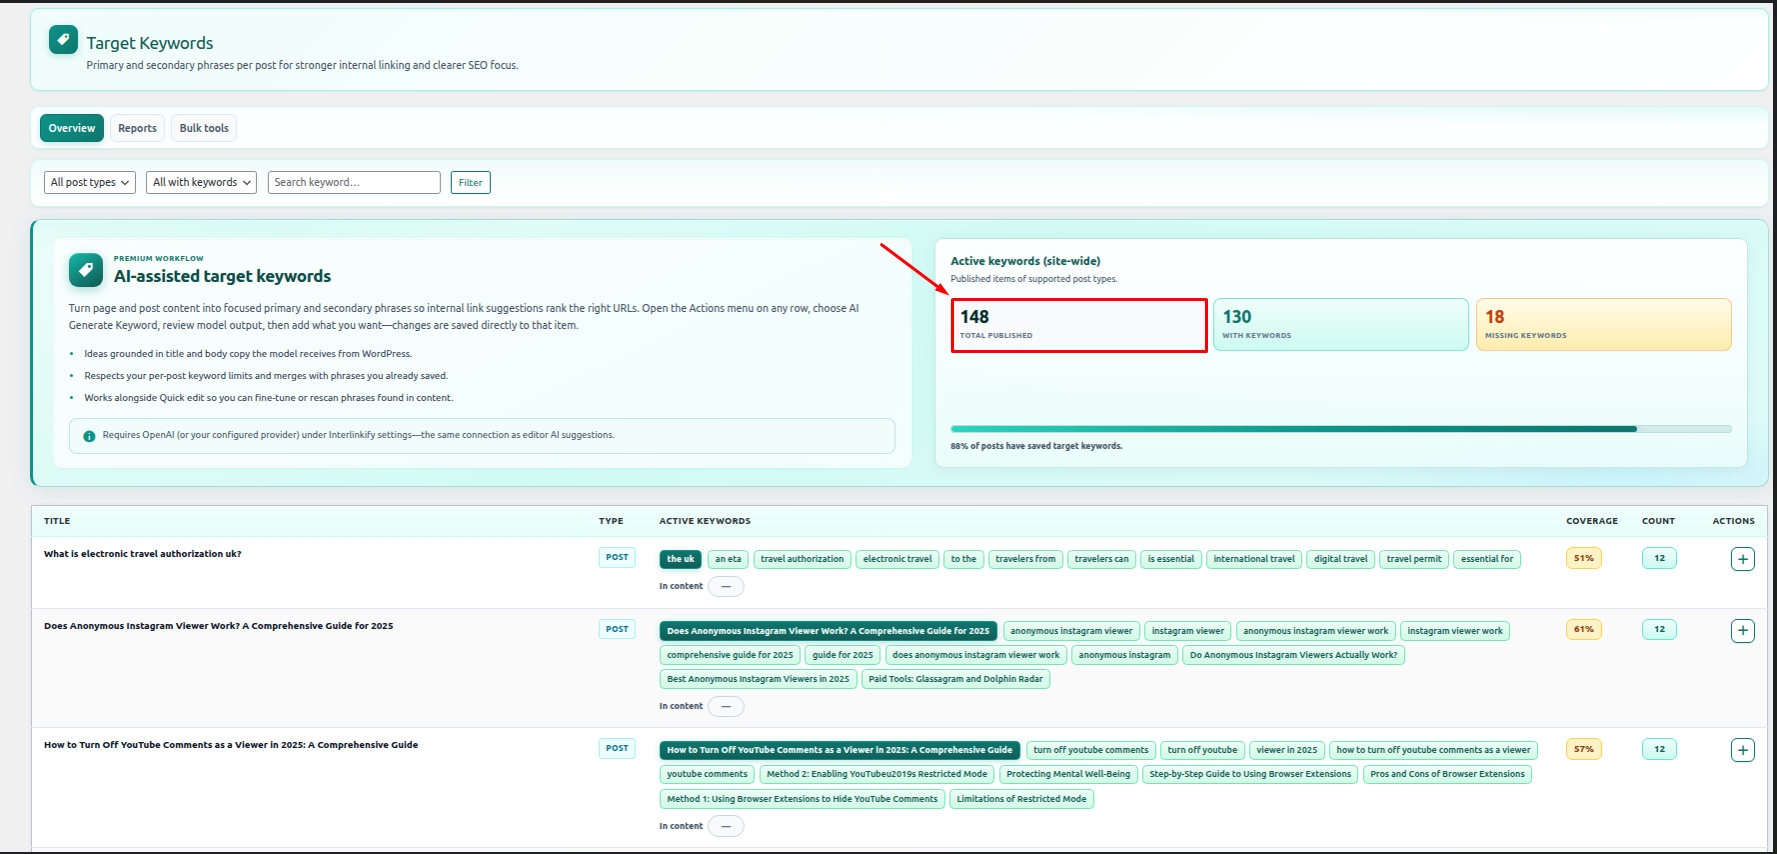
6. Target Keywords
Target Keywords help Interlinkify understand the main topic of each post and generate better internal link suggestions.
- Open the Target Keywords section.
- Review suggested or existing keywords.
- Add a primary keyword for each important post.
- Add secondary keywords if needed and save.
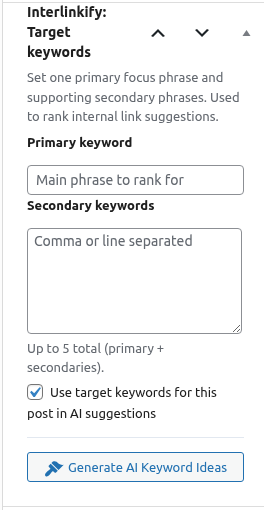
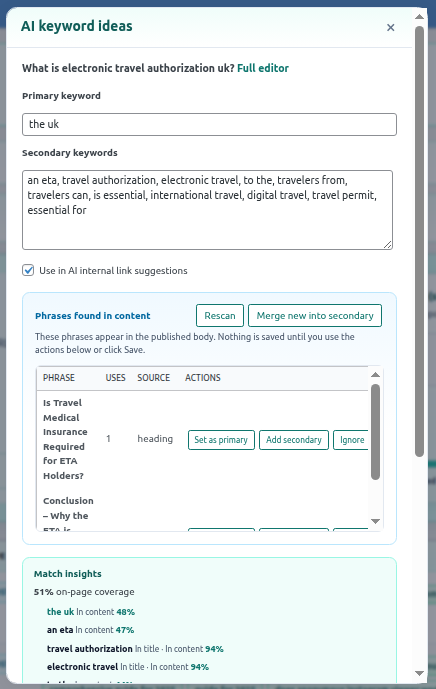
6.1 AI Keyword Ideas
The AI Keyword Ideas section helps generate and manage keyword suggestions for a post. It shows primary keywords, secondary keywords, phrases found in content, and match insights.
- Open the post or page editor.
- Click Generate AI Keyword Ideas from the Interlinkify keyword box.
- Review primary and secondary keyword suggestions.
- Use Set as primary, Add secondary, Ignore, Rescan, or Merge new into secondary as needed.
- Review Match insights and save or update the post.
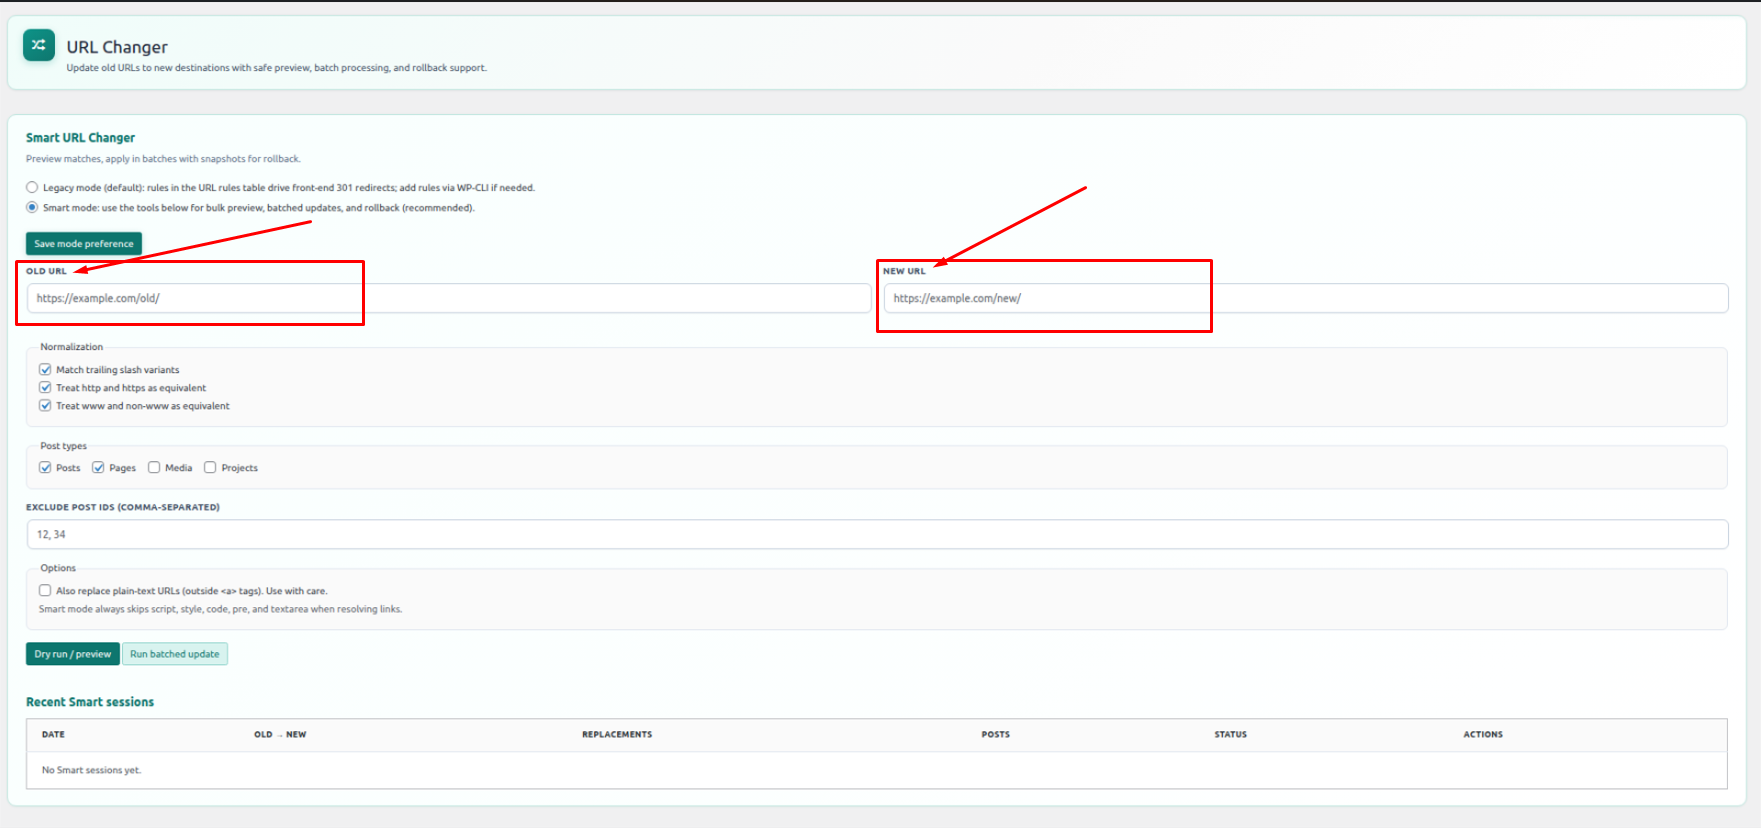
7. URL Changer
The URL Changer helps replace old URLs with new ones across your website. This is useful after changing slugs, domains, or page URLs.
- Open URL Changer from the Interlinkify menu.
- Enter the old URL and new URL.
- Select content type if required.
- Apply the change and review the result.
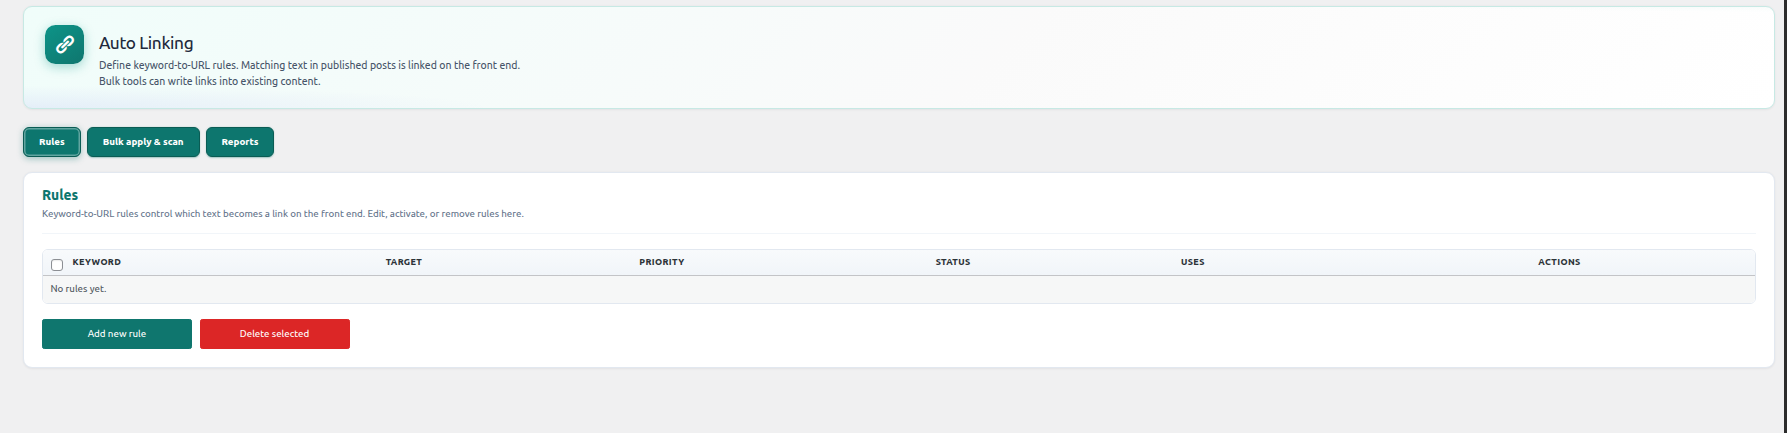
8. Auto Linking
Auto Linking lets you create rules that automatically add internal links when selected keywords appear in your content.
- Go to Auto Linking.
- Create a new auto-linking rule.
- Add the keyword or anchor text and select the target URL.
- Save the rule and let Interlinkify apply links automatically.
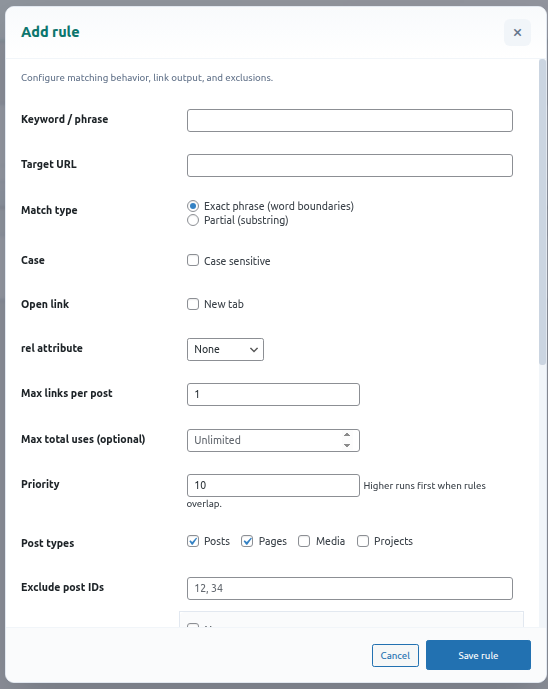
8.1 Add Rule
The Add Rule section lets you create an auto-linking rule with keyword, target URL, match type, link options, limits, and post type controls.
- Open Auto Linking and click Add Rule.
- Enter the Keyword / Phrase and Target URL.
- Choose Match Type, New Tab, rel attribute, and link limits.
- Select the post types where the rule should apply.
- Click Save Rule.
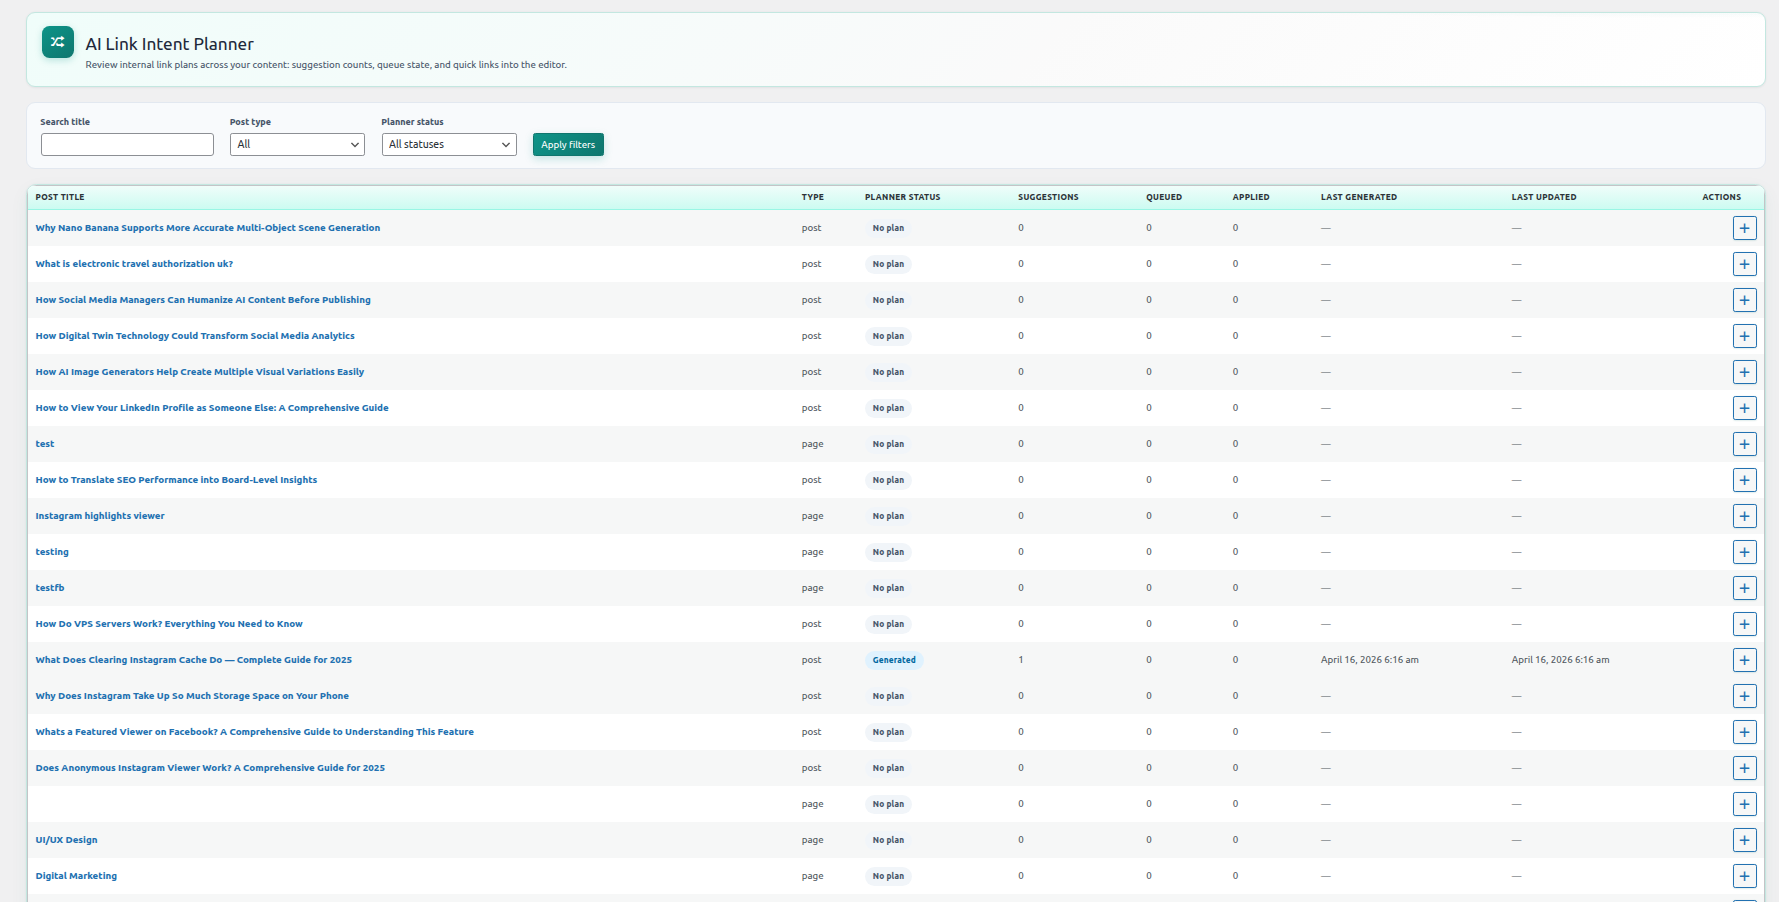
9. AI Link Intent Planner
The AI Link Intent Planner helps discover smart internal linking opportunities using AI. It checks page intent, keywords, and content relevance.
- Open AI Link Intent Planner.
- Select the site or content type.
- Run the planner to generate suggestions.
- Review suggested internal links and apply only relevant suggestions.
10. Inbound/Outbound Link Suggestion
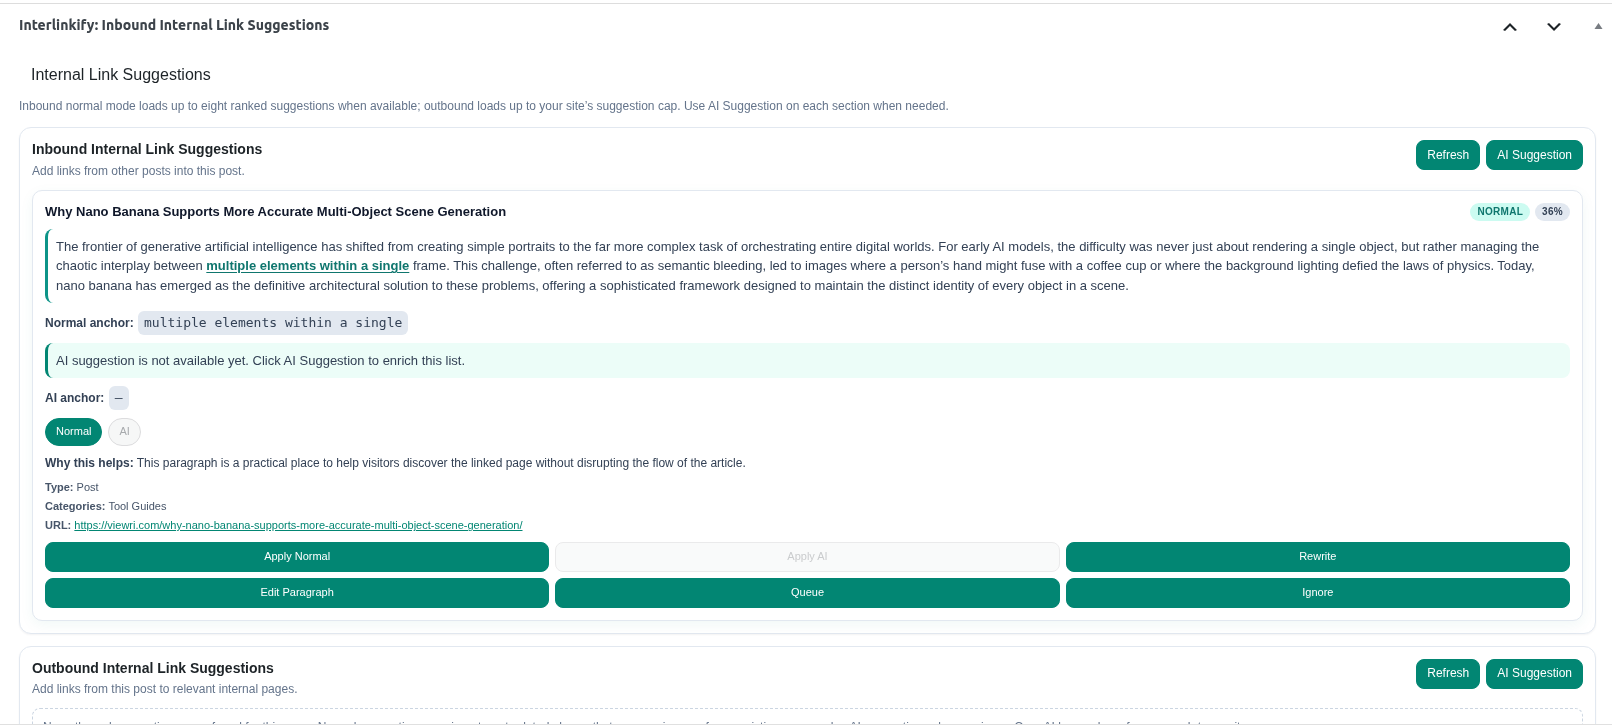
10.1 Metabox Inbound/Outbound Suggestion
The Meta Box Inbound/Outbound Suggestions section appears inside the WordPress post editor. It helps add internal links directly while editing a post.
- Open any post or page in the WordPress editor.
- Find the Interlinkify: Inbound Internal Link Suggestions meta box.
- Review suggested paragraph, anchor text, target URL, and link reason.
- Use Apply Normal, AI Suggestion, Rewrite, Edit Paragraph, Queue, or Ignore.
- Check Outbound Internal Link Suggestions to add links from the current post to related pages.
10.2 Add Inbound/Outbound in the Posts Crawled Page
This section lets you manage internal link suggestions directly from the crawled posts list.
- Open Posts Crawled from the Interlinkify menu.
- Use search, post type, sort, and order filters to find a post.
- Review inbound internal, outbound internal, and outbound external link counts.
- Click Action, then choose Add Inbound Internal Links or Add Outbound Internal Links.
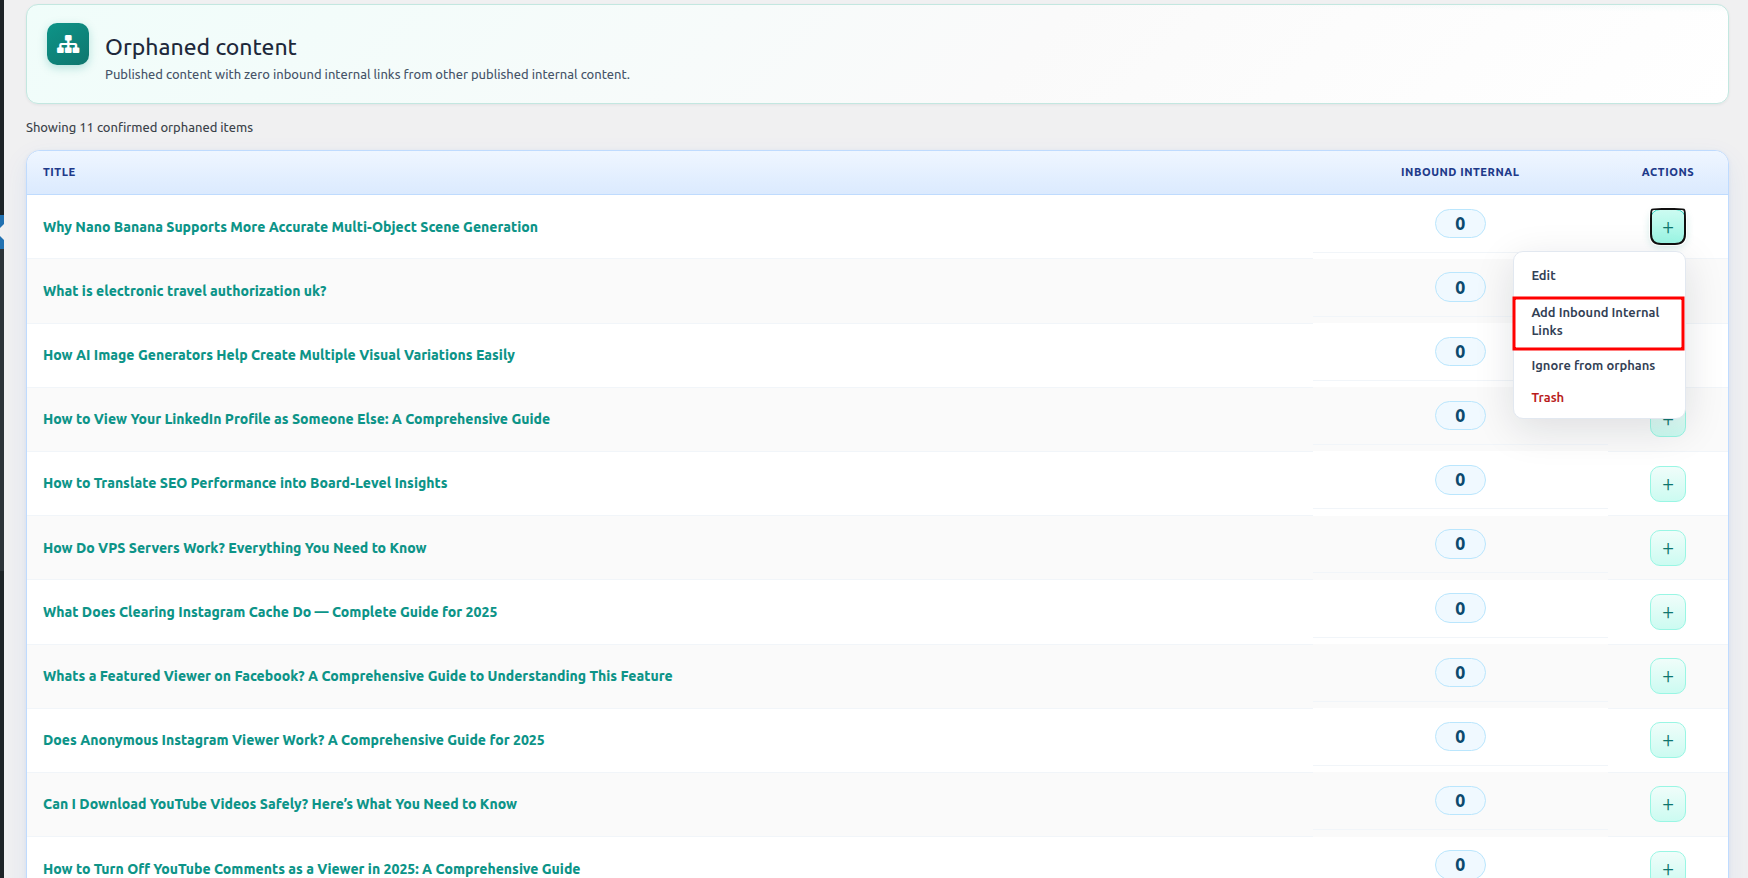
10.3 Add Inbound Suggestion in Orphaned Page
This section helps you find orphaned posts and add internal links pointing to them.
- Open Orphaned Posts.
- Review posts with low or zero inbound internal links.
- Click Action beside the orphaned post.
- Select Add Inbound Internal Links and apply the most relevant suggestions.

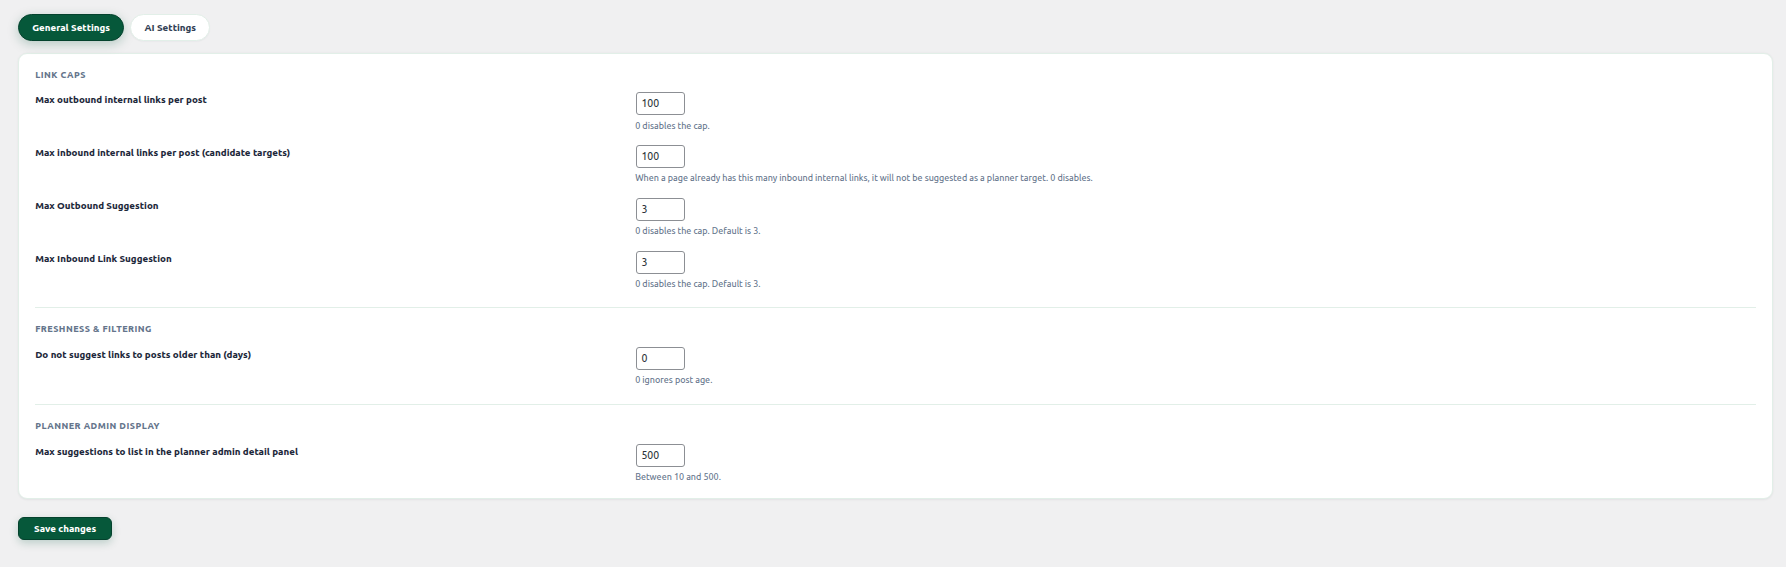
11. General Settings
General Settings control how Interlinkify works on your WordPress website, including link limits, suggestion behavior, and plugin preferences.
- Open Settings from the Interlinkify menu.
- Go to the General Settings tab.
- Review each option and update settings based on your website needs.
- Click Save Changes.
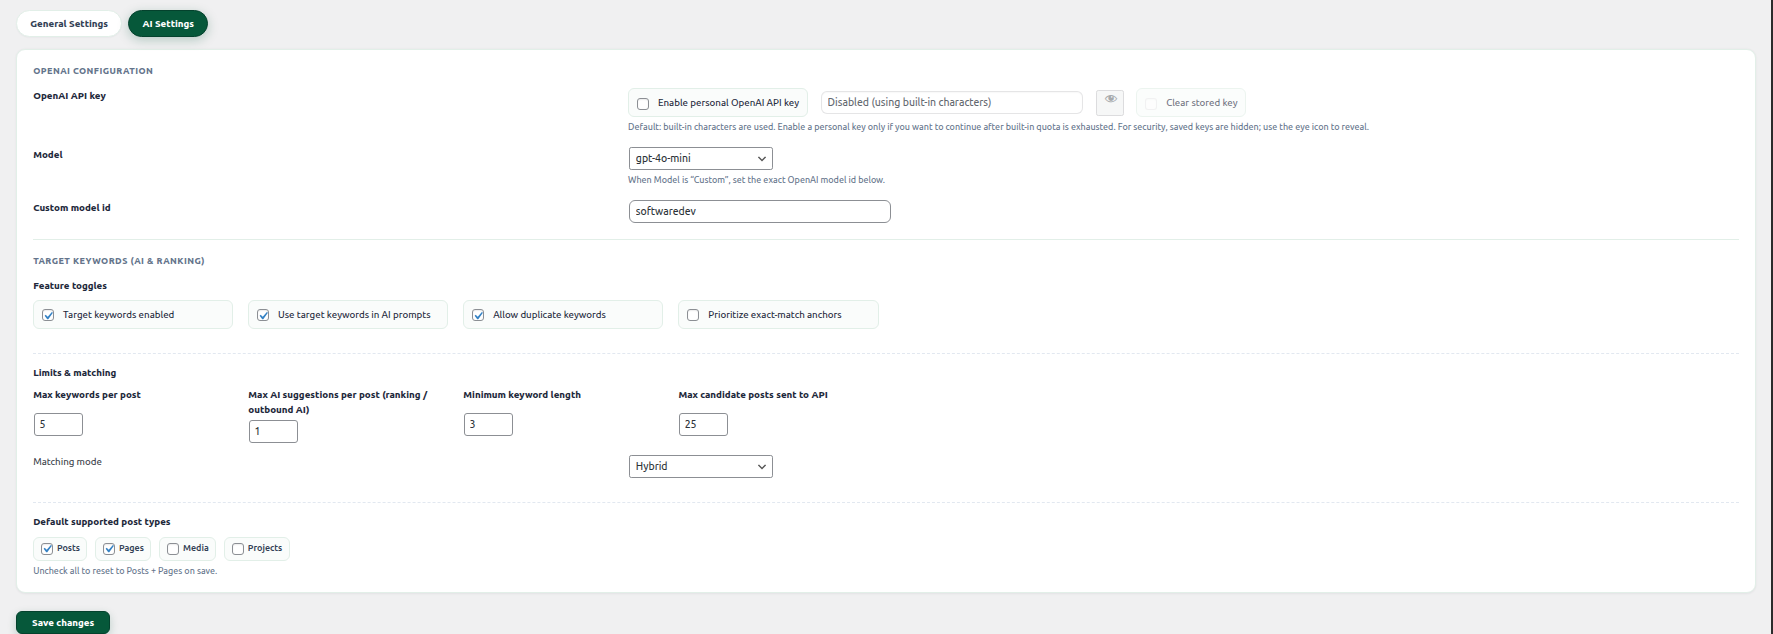
11.1 AI Settings
AI Settings control AI-powered features such as suggestions, keyword ideas, and AI-based link planning.
- Go to Settings.
- Open the AI Settings tab.
- Enable or adjust AI features as needed.
- Save settings before using AI tools.
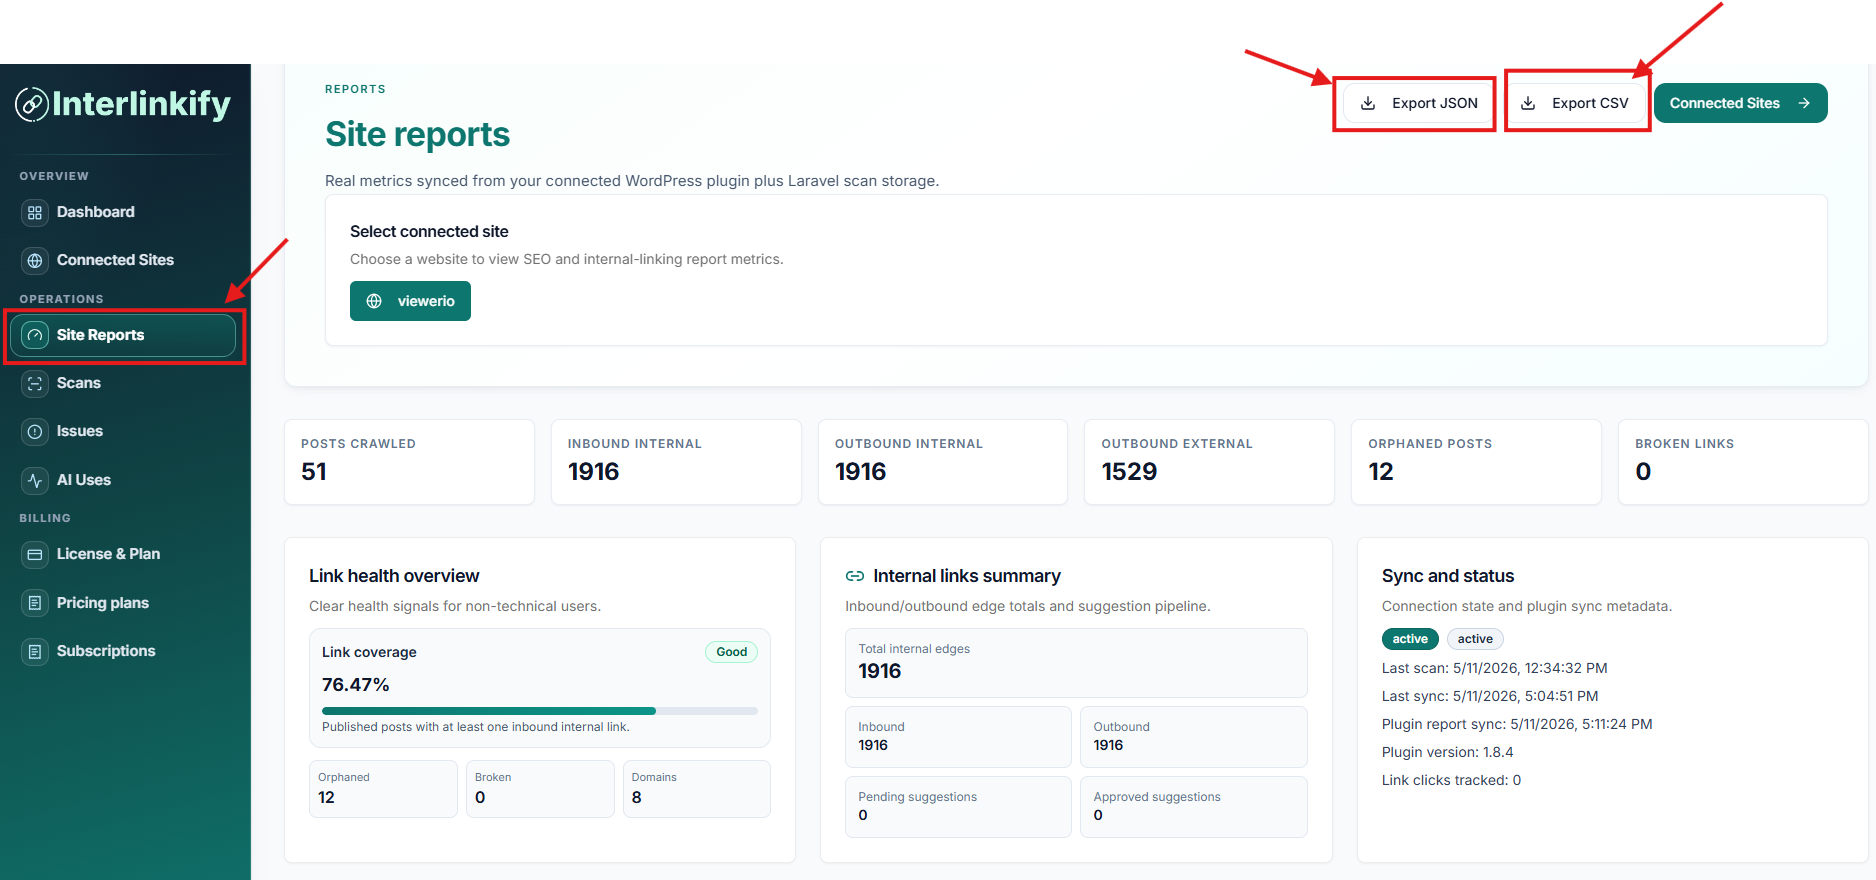
4. Site Report
The Site Report section gives a complete overview of internal linking performance. It helps you understand link counts, site health, broken links, and missing internal links.
- From the Interlinkify dashboard sidebar, click Site Reports.
- Select the connected website you want to review.
- Review posts crawled, inbound links, outbound internal links, outbound external links, ignored links, and broken links.
- Check Link Health Overview, Internal Links Summary, Sync and Scan Status, plugin version, and update status.
- Export JSON or CSV for SEO audits, client reporting, spreadsheet analysis, or internal planning.
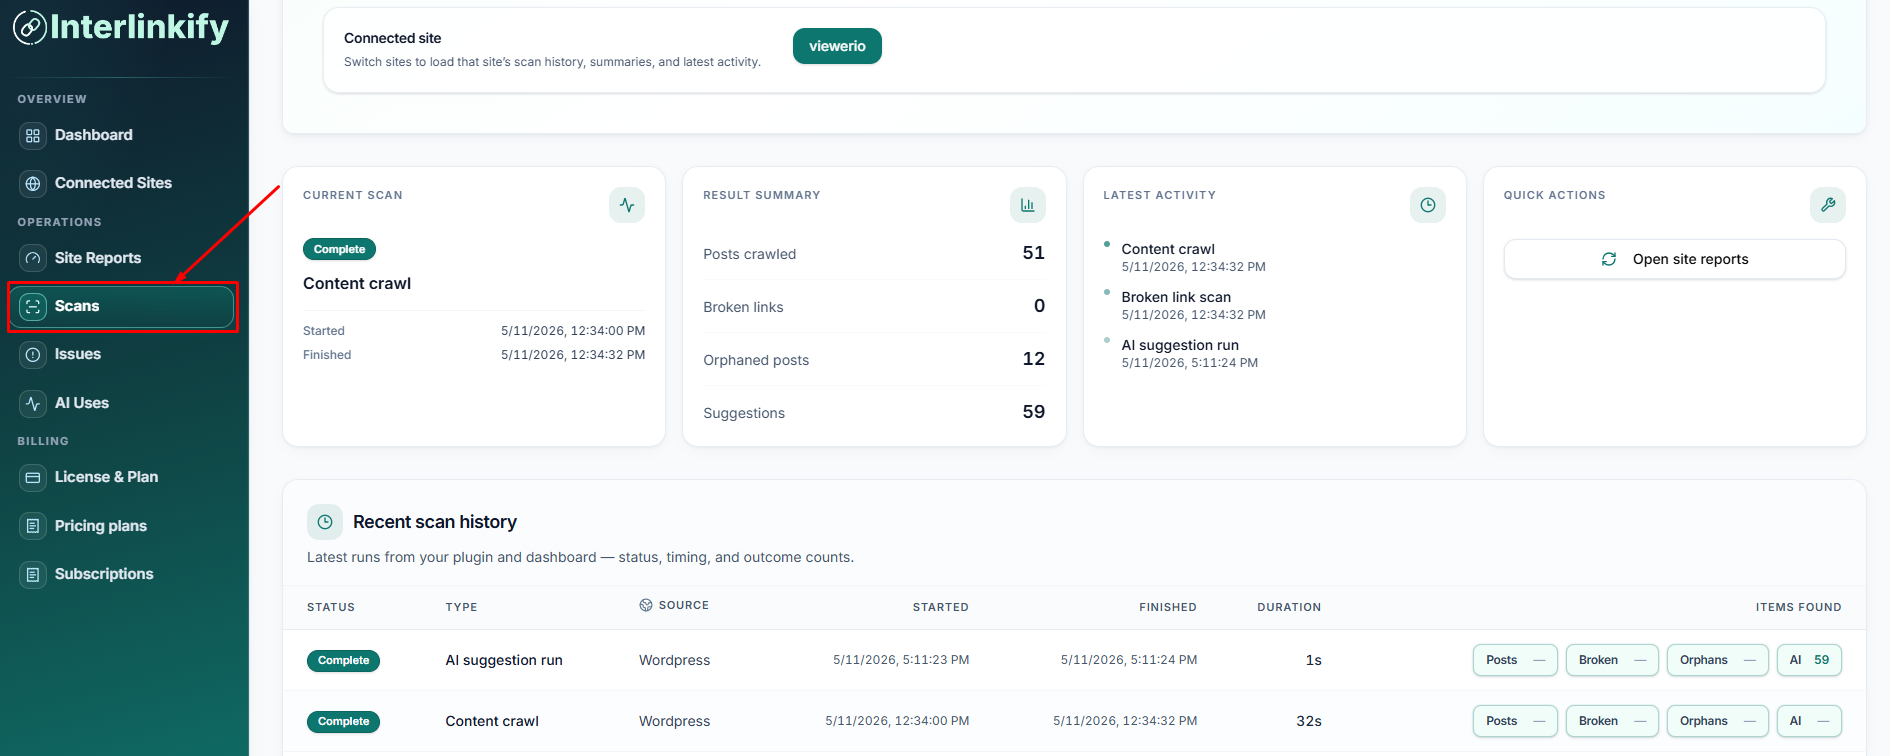
5. Scans
The Scans section helps monitor website crawling and internal link scanning activity. It shows current scan status, latest results, scan history, and scan-related actions.
- Open Scans from the Interlinkify dashboard sidebar.
- Select the connected site you want to scan or review.
- Review scan status, scan type, start time, finish time, and completion status.
- Check latest summary, latest activity, recent scan history, and row actions.
When Should You Run a New Scan?
- You publish new posts or pages.
- You update existing content.
- You change URLs or permalinks.
- You add new categories or content hubs.
- You want new internal link suggestions, fixed broken links, or refreshed orphan page data.
6. Issue
The Issue section helps find and monitor problems detected by Interlinkify, including broken links, connection problems, missing links, orphan pages, or other internal linking issues.
- Open Issue or Issues from the dashboard sidebar.
- Select the connected website and load issue data.
- Review summary cards for total issues, critical issues, hidden issues, notices, and live issues.
- Open issues and fix them by reconnecting, verifying token, re-running scans, fixing URLs, adding internal links, or updating settings.
- Run a fresh scan or refresh the Issue section after fixing problems.

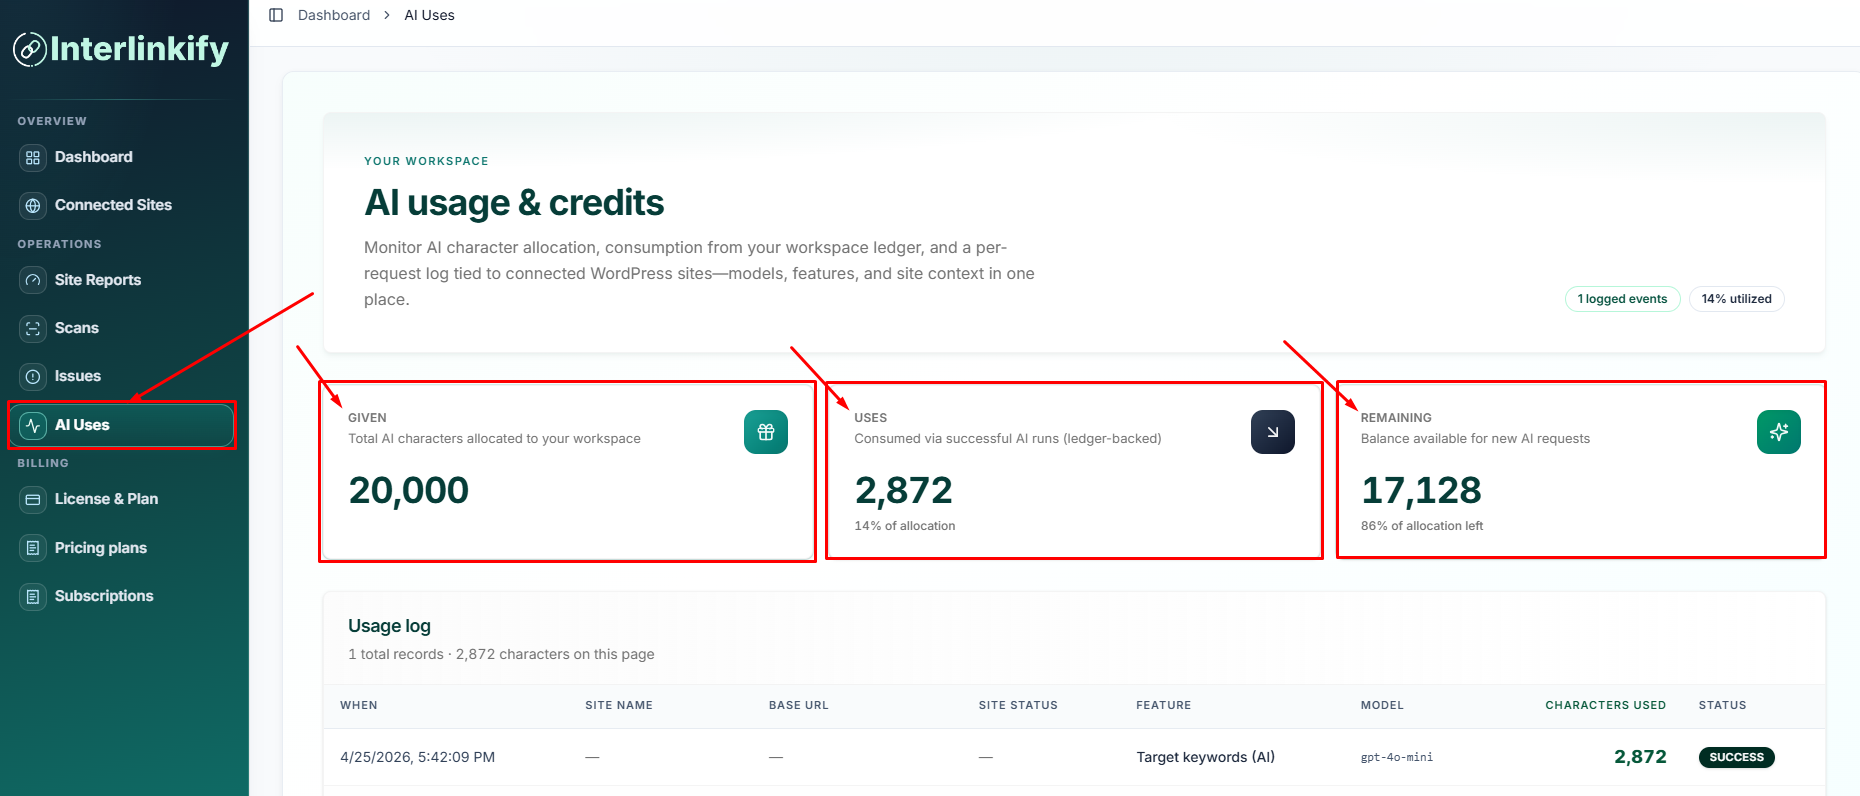
7. AI Uses
The AI Uses section helps monitor AI credit usage inside Interlinkify. It shows total credits, used credits, remaining credits, and usage logs.
- Open AI Uses from the dashboard sidebar.
- Review total credits, used credits, and remaining credits.
- Check the usage log for event name, site name, date, feature, AI model, character usage, and status.
- Use AI credits wisely by scanning content first, using AI on important pages, and avoiding unnecessary repeated AI scans.
Quick Support Note
If your site does not connect, reports look outdated, scans do not complete, or AI credits are not updating correctly, check these first.
- Make sure the Interlinkify plugin is installed and activated.
- Confirm that the correct Workspace Sync Token is pasted in WordPress.
- Click Verify Now again from the WordPress plugin license screen.
- Confirm your Base URL matches your WordPress site URL.
- Run a new scan after making major content or URL changes.
- Refresh your Interlinkify dashboard after fixing issues.